Viser opslag med etiketten Nailstickers. Vis alle opslag

torsdag den 10. marts 2011

Deep Sea Mermaids - Nailtopia Nail Stickers!

It's time for another review of a product I received from Nailtopia! :)
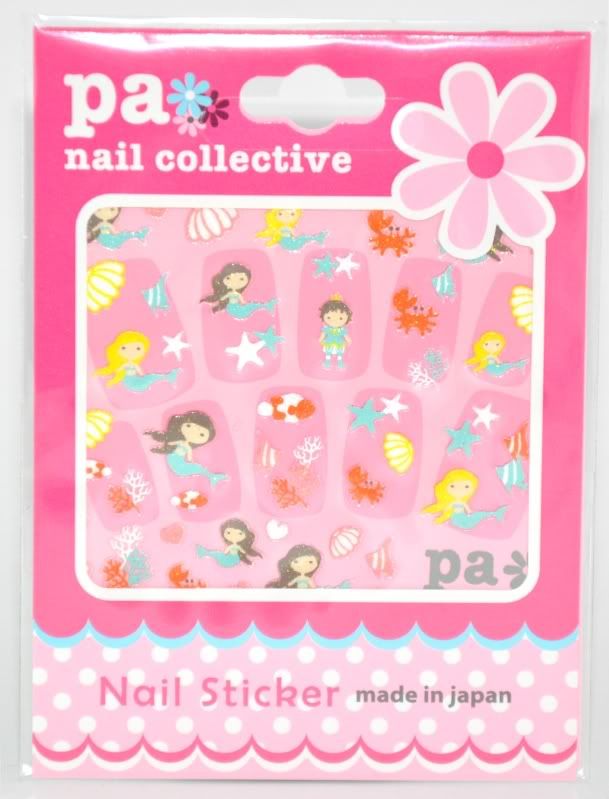
This time it's a cute sticker sheet from Pa, a Japanese brand. Stickers are the same good quality as I've experienced every time I've tried stickers from Nailtopia, very flexible, and these are opaque so they're perfect for dark base colours.

Included in this sheet are adorable mermaids, shells, corals, stars, crabs, fish and one that baffled me a little: a boy! It's inspired by The Little Mermaid written by H.C.Andersen, a famous Danish writer, transformed into one of the most popular cartoons by Disney. This sheet is, very appropriate, called The Little Mermaid ;) It retails for 2.90 £.

The colour theme of these are very light, and I wanted some contrast in my manicure. I started with a dark base colour - Misa's Office Polish-tics. 

I then added pointy tips with China Glaze's For Audrey, and also put on a coat of Essence - Glisten Up! on For Adrey, but it didn't come out too good in the pictures. Imagine it's there, okay? :) I also added some dots with a dotting tool to mimic the look of air bubbles. Lastly, I covered it in a thick coat of Fast Forward top coat to prolong the wear.
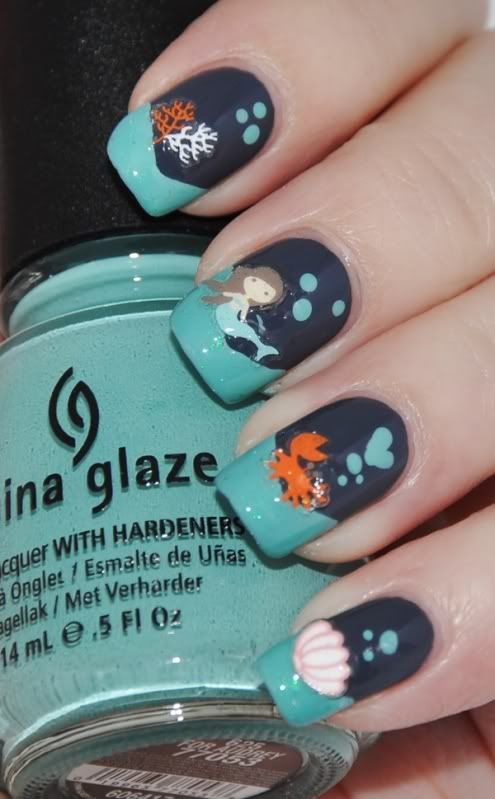
I had a little issue with the stickers bending upwards in the sides, and I suspect it's because I touched them too much before placing them (note to self: buy a very small tweezer instead of touching all the sticky part with your fat fingers, silly!). I thought I'd better mention it so you don't make the same mistake ;) Sadly, it is visible in the pictures.

Office Polish-tics, For Audrey, Glisten Up! and Pa nail stickers from Nailtopia

I really dig the colour combination! Orange, dark blue-based grey and Audrey is a winner in my book. And the stickers are really adorable for Summery manicures, I will definitely use these on my toes when the time comes! Once again I'd like to thank Nailtopia for providing these for review, I had so much fun thinking of manicures with them!

Do you like the colour combo, and what's your opinion on the stickers?

♥ Vetten

These were provided for an honest review

lørdag den 26. februar 2011

Nailtopia Dried Flower Stickers : A review

Hey guys! Hope you're having a splendid Saturday :) I'm taking it slow as I'm recovering from a day in bed. What better way to take it slow than to sit and play with nail polish?

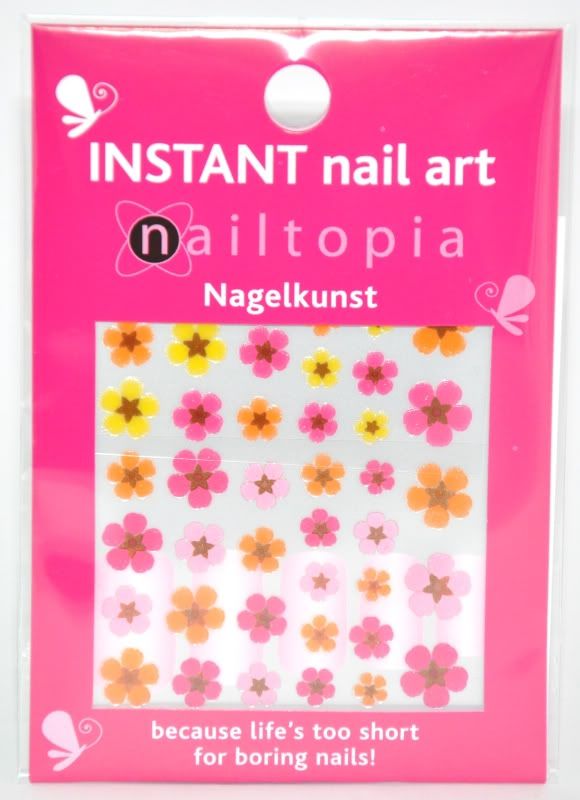
Nailtopia Hot Mix Dried Flower Stickers
Today I'd like to show you some cute flower stickers I received from Nailtopia to review. These are available in lots of different colour combinations - the one I received is called Hot Mix and is a mix of hot pink, light pink, orange and yellow flowers. The sheet is divided into two - with two different colour combo's; hot pink, light pink & orange, the other combo is hot pink, orange and yellow.

I like the design of these - they are designed as a substitute real dried flowers - and personally, I'd much rather use stickers than the real deal as they can be a bit thick and bumpy.

Like the other products I have from Nailtopia, these are made of rubbery plastic so they are quite flexible. Unlike the Alice in Wonderland stickers, they are a bit see-through - which means they are best suited for light base colours. While I prefer opaque stickers, these are still too cute to resist ;)

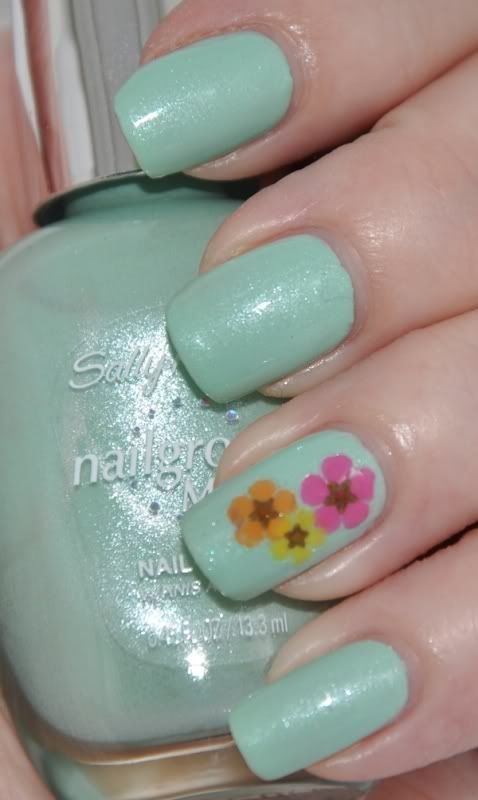
I decided to do an accent nail - I don't think I'd be able to pull a manicure off with these on every nail. I am sure these would look stellar on a Summer pedicure, even on all my toes, so I will definitely save some for Summer ♥

As my base colour, I used 3 coats of Sally Hansen Gentle Blossom. While the polish felt dry, I soon learned otherwise when I applied the stickers - so there's a bald spot underneath the orange one. Ooops! Hopefully it won't be an eyesore to you as it is to me ;)

Sally Hansen Gentle Blossom + Nailtopia Dried Flower Stickers

All in all, I'm very satisfied with these stickers - the only thing I think could be improved would be making these opaque (it would make layering a bit prettier too, IMO). It's not a big enough bother for me to not use them though!

Have a great weekend!

♥ Vetten

(these were sent to me for an honest review)

søndag den 13. februar 2011

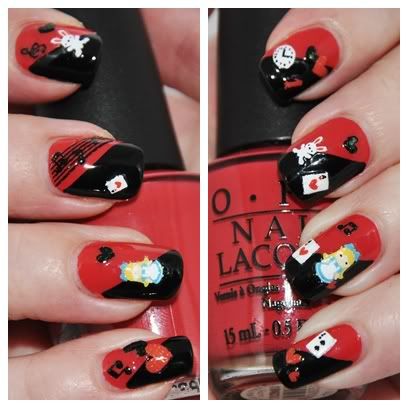
Alice in Wonderland / Valentines manicure

Hey girls! Doing anything fun this weekend or on Valentines day? :)

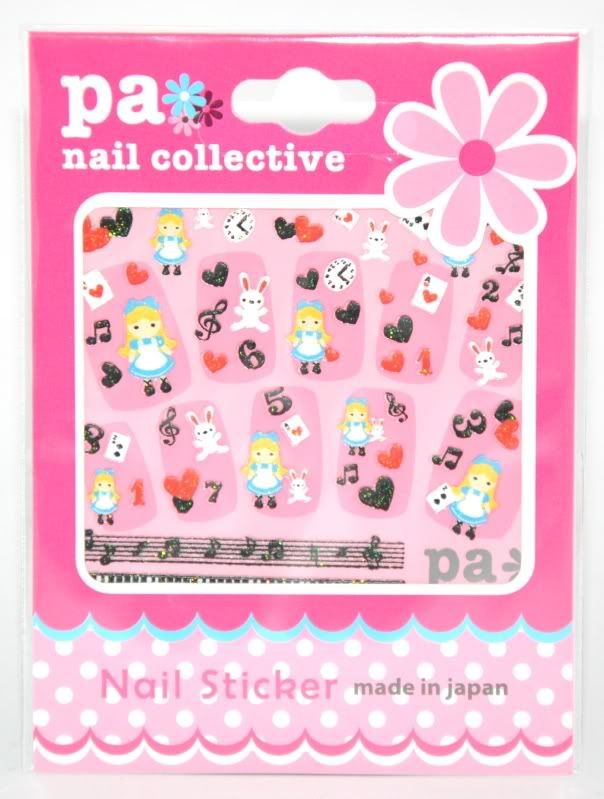
Alice in Wonderland inspired stickers
I know Valentines day is an American tradition, and a lot of people in Denmark are against the concept of "adopting" the tradition seeing as it is mainly stores that wants us to spend money LOL. I like the idea behind Valentines day though (what can I say - I love any excuse to spend time with my loved ones and I love everything tacky!), and even though I'm not celebrating anything with my boyfriend, I figured I could do a manicure and celebrate in my own way ;)

I bought the stickers to the left from an internet store based in the UK, Nailtopia. I love Alice in Wonderland, I've always been a fan of the Disney cartoon (or the fake version I grew up with - I wish I could find it!), and with the movie released last year my love was rekindled.

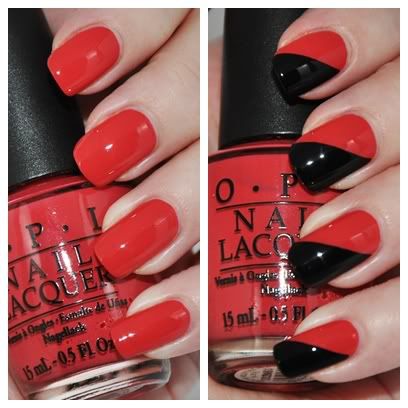
I wanted a base that fitted both the red and black stickers, and thought it would be fun to use a red base for the first time. Yes, this is the first time I'm wearing a red polish! Ever! But, as I suspected, red alone isn't really me, so I found my black creme from WnW and some scotch tape :) Sorry if you think it's a bit tacky/boring I used the diagonal design again - I really like it and don't grow tired of it within a few hours as I do with funky french manicures. So be prepared to see a few of these in the future ;)

I used my new OPI Paint My Moji-toes Red as the base (after seeing it quite a few times on Neglenymfernes blog I decided it was the perfect red, and I wasn't disappointed). It covered nicely in one coat, then I used a coat of Fast Forward topcoat, then did the diagonal with scotch tape and my black creme, added another layer of Fast Forward, and then I was ready for the stickers! I used a layer of Fast Forward on top of the stickers to prolong the wear of them.

OPI Paint My Moji-toes Red + WnW Black Creme
For the first time in - well, maybe the first time ever - I decided to include a picture of my right hand of the end result :) It took me a while to paint properly with my left hand, but I think I got it now.

Right Hand            |             Left Hand
I'm thinking of cutting my nails short soon, but I feel like these long canvases are just too much fun to shorten, LOL! There's room for much more nail art :)

The stickers are really fun to work with, and again they're rubber-based so they can be stretched to fit (which was very nice with the note-thingy as I cut it a wee bit too short). All in all I'm very pleased with these and don't regret paying a little bit extra for some high quality stickers. It's a shame they're one-time use only though, as I'd love to wear Alice quite often :) I'd say there's enough for two manicures in one sheet.

♥ Vetten

fredag den 11. februar 2011

Review: Nailtopia nail strips and a flash of Teenage Dream from OPI

Today's post is going to be a bit picture heavy, but I hope you don't mind ;) I have a lot to show you!

China Glaze - Something Sweet & OPI - Teenage Dream
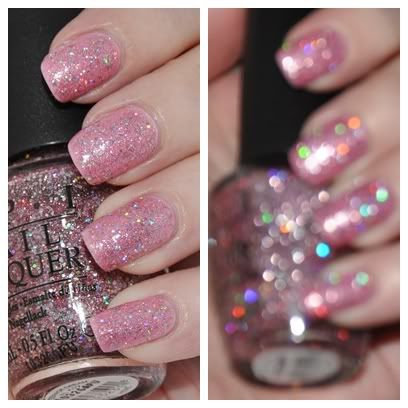
Firstly, a gigantic package arrived earlier this week and from the 20+ polishes I got I'll be showing you two of them today. For the glittery result you see below I used the two polishes to the left: China Glaze - Something Sweet and the glitter is my favourite from OPI's collab with Katy Perry - Teenage Dream.

I used two coats of Something Sweet and two coats of Teenage Dream. Teenage Dream is a very dense glitter, it's base is pink and very thick but still manageable. In my experience OPI makes some great glitters and TD is certainly one of them. I can see it being pefect for light, summery manicures and I will definitely be using mine more as the weather gets better ;)

I took a picture in my lightbox of the result and it really washed out the holo effect of the glitter, so I decided to do a blurry shot so you can see why this glitter is so amazing :) 


I'm pleased to say it's everything I dreamed about after seeing the promo pics/video last Winther. I had high expectations, but I was counting on it being necessary to use a base colour, so that doesn't bother me.

ChG - Something Sweet & OPI - Teenage Dream
My only issue with this is not the polish' fault.. I'm really disappointed to admit that this colour combination isn't "me" on it's own - it's a bit too sweet looking. In general, warm pastel colours doesn't fit my style or skintone, so I usually steer clear of pale purple and pink, but I wanted this to work so hard that I took the chance anyway. I'll be trying it with a darker base next time, perhaps a dark purple or blue.

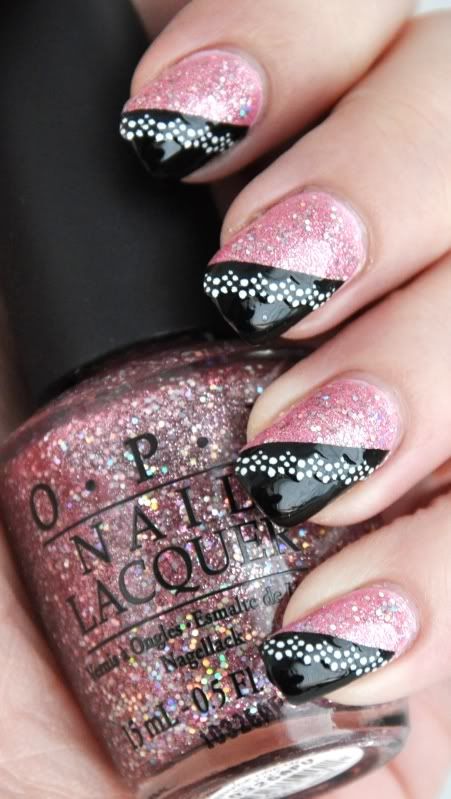
Anyway, I wasn't going to give up with this manicure. To my luck I had just bought a spare of my one-coat black creme - Wet'n'Wild Black Creme, and I received a package from Nailtopia with some products to review, and what better time to have some fun with stickers? :)

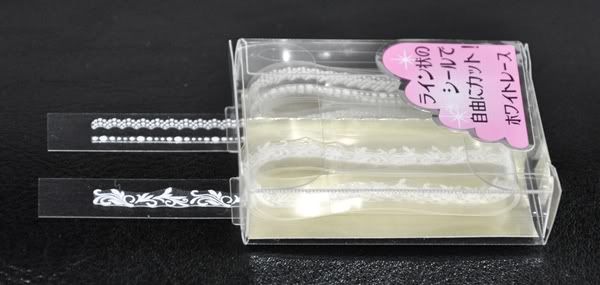
Here's the product I'll be reviewing:

Nailtopia Nail Strips Design LS-4

At 3.49£ a package, you get 3 x 30 cm strips. While I am usually very cheap when I buy nail stickers, I'd say this box is a good deal - I used approx. ½ of one strip, meaning there's enough for up to 6 manicures (depending on how many strips you want per nail ofc). And the quality is very good - they are self-adhesive and rubber-based, so you can stretch them very carefully if you cut them a few mm too short or just want the desired design to fit your nails. I was very impressed with this once I learned how to manage them with my clumsy fingers, LOL! And it's quite easy to measure how much you need, you can do this while the backing is still on.


Here's the result on my nails!

ChG - Something Sweet, OPI - Teenage Dream, WnW Black Creme & Nailtopia nailstrips
I love it! I topped it off with China Glaze Fast Forward to prolong the wear of the nailstrips/stickers. I'd suggest using two layers of topcoat if you want the sticker to be completely invisible, but since I'm already wearing 9 layers on my nails including all colours and base coat, I called it a day with one.

What do you think of Teenage Dream, and how do you like the design I made? :)

♥ Vetten

The nailstrips used in this post was received for review. This does not affect my opinion in any way.