Viser opslag med etiketten NailDecal. Vis alle opslag

mandag den 16. maj 2011

Viva La Nails Water Decal Nail Wraps (review)

It's time for a review!
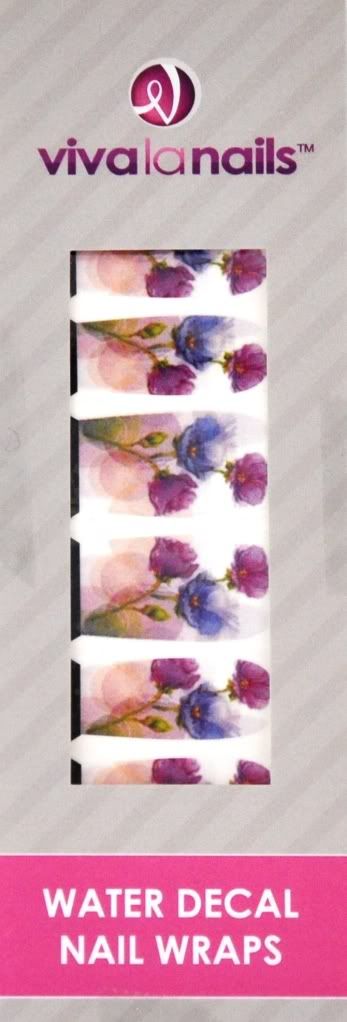
I was super excited when Viva La Nails sent me an email with the offer of reviewing their new Water Decal Nail Wraps - all I had to do was pay shipping. I've wanted to try full nail decals for a long time, but the price always stopped me. Of course, I caved when offered them for next to nothing and ordered them! :)

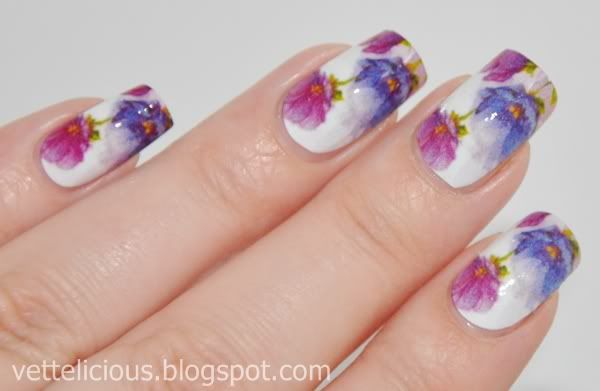
I got 8 different designs and I decided I shouldn't try my favourite first as I have no experience in using these. The design I'm showing here is called #09. It features beautiful watercolour-like purple flowers. If it wasn't because I don't have much clothes to match, I would've kept these for a special occassion - they are really pretty. I think a lot of these designs have a tendency to look printed - like you can see grains and white dots upon close inspection, but I found the ones I received were well done. #09 was the only one showing small white specks on macro shots. It is much less noticeable in real life.

Each set comes with 10 nail decals in 3 sizes as far as I could see - 2 small, 6 medium and 2 large. I totally lucked out when they designed these; they match my nail width really well! All I had to do was cut them length-wise.

They cost 2.95£ and there's a lot of cool designs to choose from - I'm particular fond of the sugar-skull theme <3

Let's take a look at the instructions;
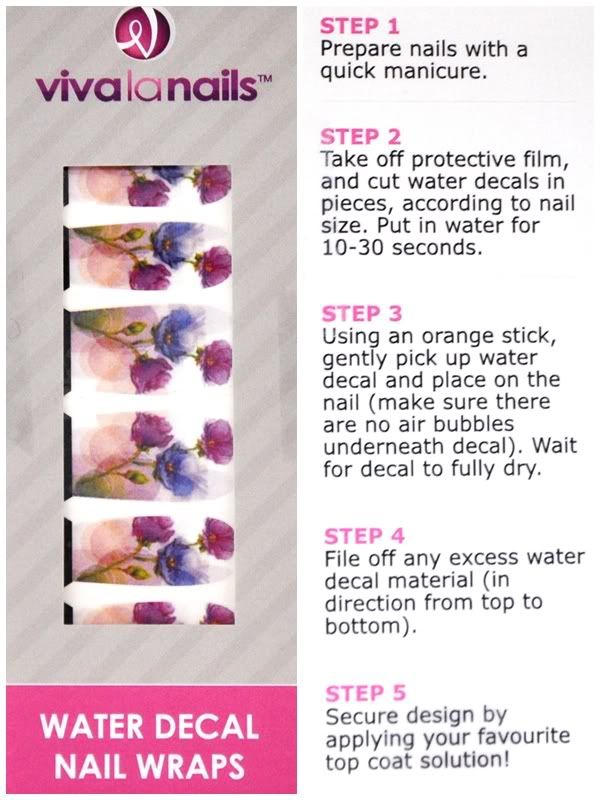
Viva La Nails Water Decal Nail Wraps

I recommend taking one of the decal-leftovers (one of the black parts you're not using anyway) to practice with on a nail-wheel or something else that is non-absorbent before using these. Remember, there's only 10 in the package so no place for screw-ups ;)

Not sure what they meant with a quick manicure, I decided to use a basecoat (NailTek II) to be on the safe side. Having tried these, I recommend using a ridgefilling basecoat as the decal itself is thin and will show ridges and other imperfections in your nails. I then proceeded to cut the decals to be 1-2 mm longer than my nails, and started applying them one by one. 
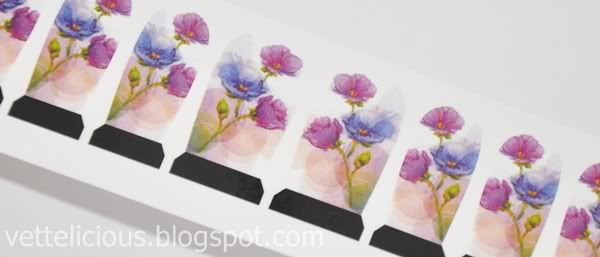
Viva La Nails Water Decal Nail Wraps

I found them very easy to apply - you have a long time to place them correctly and smooth out wrinkles and air bubbles. I used my fingertips for this initially, but it was much easier to smooth them out with a q-tip. I worked from the middle of the finger and outwards to the sides.

Once the decals was dry and stuck to my nails, I filed off the excess holding my nail horisontally and my glass file vertically. I made sure there was no "loose" ends where the decal had lifted from the nail. If there was, I found it easy to fix - a warm breath and a firm press would attach it! Lastly, I applied my topcoat, China Glaze Fast Forward, and even though I kind of tried to get the decal to smear, it didn't happen lol. I wanted to test them, remember? :) I ended up having some wrinkles, but they were almost invisible when I applied topcoat. 

Now I think it's time to show you the results! Remember this is like 10 times real size, so any imperfections shown here was honestly invisible in real life ;)

Viva La Nails Water Decal Nail Wraps
And another shot of these;

Viva La Nails Water Decal Nail Wraps
I love the result! ♥ And the best part? I wore these 4 days, and there was only tiny wear on some of the nails when I decided to remove them (I used my regular polish remover). I didn't even use topcoat every day to renew it... Now that's something worth your money! These will probably last twice the time if you'd like; I'm a polish freak so I had to make a new manicure after four days, lol. Maybe they'd last up to 10 days with a new layer of topcoat every now and then? I just might have to put another set to the test! These will be great for travelling.

There's only one thing about these I'm not thrilled with... The fact that you get 10 decals. No extras for screw-ups. Granted, these are hard to screw up, but still... What if the mailman rang the doorbell with nail polish packages while I'm busy placing one of them on my nail? LOL

All in all, I am very satisfied with these. They are easy to use, good quality and above all; they're fun! It's a nice change from plain colours, no unpleasant smell (very convenient for when I have a headache), stamps and nail art - I will never have the patience to paint something this detailed on all my nails. If you're thinking of trying decals, I can definitely recommend these!

What's your opinion on these - yay or nay? :)

♥ Vetten

mandag den 17. januar 2011

Manhattan : 101S aka another dark grey creme

*UPDATE at the bottom*

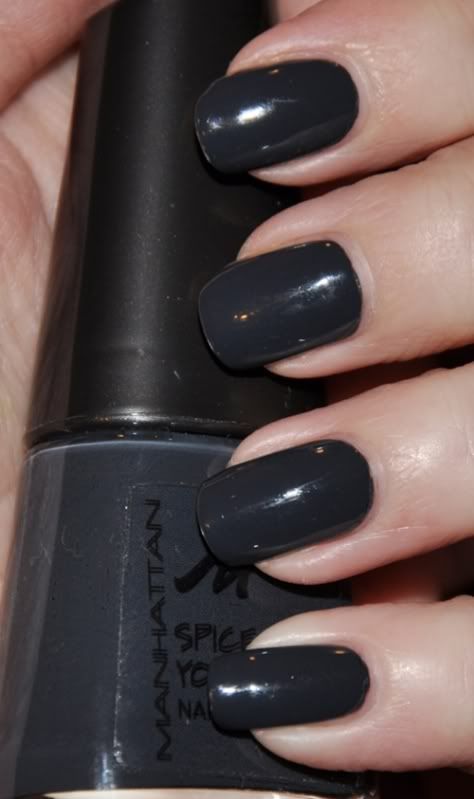
Today I wanted to try a new polish I bought from the brand Manhattan. I'm a sucker for dark, almost black greys and this pretty polish looked like it was right up my alley.

It definitely is ♥

Manhattan 101S, flash
(excuse the wear, I had to go shopping right after applying my Seche topcoat and couldn't get any pics until this evening so it looks quite a bit worn).

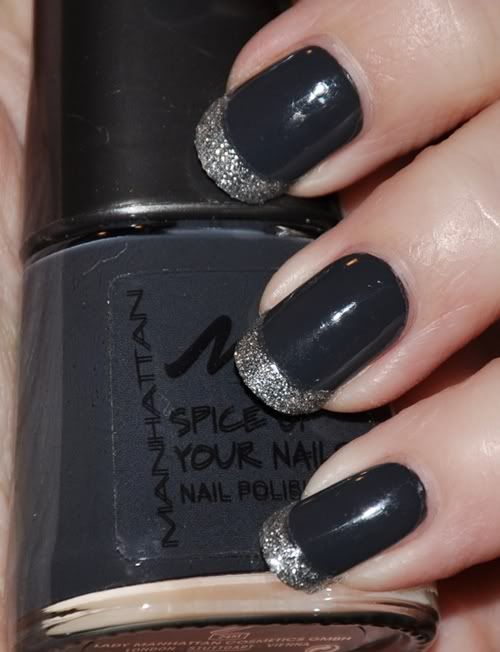
I've been wearng a lot of cremes lately, so I thought about spicing them up a bit. I remembered some stickers I picked up in Germany from Essence, silver glitter french style stickers. I've been saving them for a dark creme, and this was a great opportunity :)

Here it is without topcoat (and really, it still looks like stickers on the tips of your nails. I highly recommend a topcoat on these, not only to make them last longer but also to remove the sticker-esque feel).

Manhattan 101S + Essence French Glam stickers
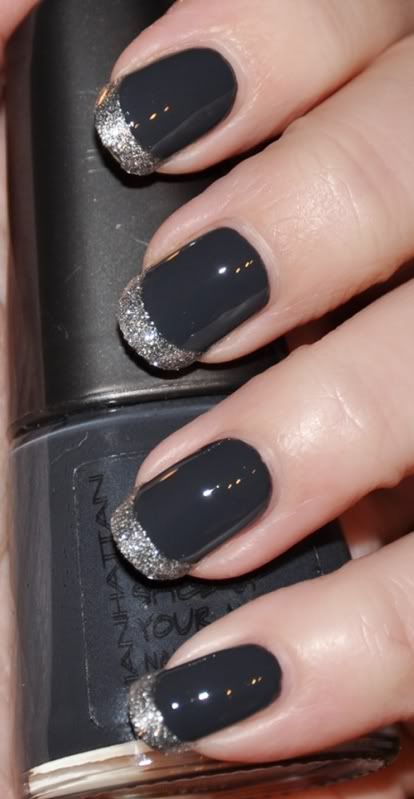
Here's the final manicure with a cot of Seche Vite;

Manhattan 101S + Essence French Glam stickers

I honestly have no idea what happened to the sticker on my pointer, it looks like Seche might've shrinked it?! D: Not the look I was going for.

Manhattan 101S is definitely is must-have, if you like dark cremes. It's a two-coater, dries relatively fast and is easy to clean up. I'm liking Manhattan polishes more and more!

As for the Essence French Glam stickers, it's a good solution if you want funky french tips but don't bother the work with an extra polish that has to dry... But the result isn't as amazing as it'd been if I used the real deal. It does look a little less sticker-like IRL, but it still isn't enough. Needless to say, next time I feel like this, I'm going to do it the paint-'em-yourself-way ;)

UPDATE: Well it turns out the glam stickers didn't last long. In fact, when I woke up the morning after having applied them (and using a topcoat to seal them, mind you), 4 were already falling apart. Literally, as in the sides lifting and breaking off! I had to remove them before going to class, lol, I wouldn't be seen with 'em. I would not recommend replying these and expecting them to last for a few days, if you want the look for a party, be sure to apply them right before going.

♥ Vettelicious

mandag den 20. september 2010

Viva La Nails nailart + Paradoxal

I have a couple of pictures of Chanel's Paradoxal for you today! I decided to wear it during the weekend, since my nails don't chip as much when I'm off work ;)

Paradoxal - flash
Paradoxal - no flash
Paradoxal - natural light

Paradoxal - sunlight (see the sparkles!)

Subtle glitter = win


I really wanted to show you the Catrice polishes my mom bought from me, but I haven't had good enough light to take pics of the swatches I made. Soon, I promise!

Instead I'll show you the contents of a package I received last week - a sample package from Viva La Nails!

Viva La Nails Haul
I have only had the time to try out one thing - a white flower sticker. I've always loved nail art stickers, as they are so easy to use, but I'm very picky about which brands I purchase. Some are too thick and have too much clear plastic around them, making it very visible where the sticker is placed (making it look really cheap).
Once I decided which sticker to try it was easy to apply to my nail. It has a kind of jelly-ish feel to it, and it looks pretty neat on the nail. At 2£ for each package, I would not go crazy and buy a lot - but it's good quality and would stay on for quite a while without a topcoat, even! (Yes, I tested through an evening with cleaning, washing my hands several times). They stay on even prettier with a topcoat of course. I would recommend these to people who put quality above quantity.

Viva La Nails Nail Sticker - this is 5x RL size, so that's why the sticker line is so visible ;)

Viva La Nails Sticker with topcoat - and lots of natural sunlight for added sparkles ;) xx


I can't wait to try out the other stuff!

If you love fiddling with nailart, I would surely recommend getting their sample package - I received a total of 15 products for the cost of shipping (3£ within Europe). And they offer a wide variety of nail art, also Konad image plates. It gives you lots of different types to play with and find your preferences, before you buy anything too expensive. This may sound like a commercial, but it is not intended to, not at all. If there's something I dislike it's people recommending products just because they received them for free.

mandag den 16. august 2010

My very first post!

Today I decided I wanted to create a blog to share my newest obsession - nails! I'm still working on the design of the blog, but it's slowly coming together - a new header should be ready soon! For now, enjoy Jolly, a German White Shepherd (on this picture 4 weeks old), munching on a nail. Pretty fitting, actually.

I'm fairly new and very much an amateur, but I love buying, collecting and working with nail polish. I do it because it's fun - so if the results aren't professional, I don't care (although I do appreciate tips of course!).

I will end this introduction with a picture of the two things that started my obsession: Nail decals and turquoise nail polish from Depend <3
Please ignore the wonky layers, dry cuticles and crappy pic - I'm a newb!