Viser opslag med etiketten China Glaze. Vis alle opslag

fredag den 29. april 2011

China Glaze : Papaya Punch

Today I have something really funky to show you. I believe this is the first time - ever - I've worn bright orange nail lacquer. It's quite a big thing for me, can't you tell? :) If you notice my nails are a bit shorter, it's because I filed my nails due to a break. I must admit I love this length! So much easier to handle and paint ♥

Papaya Punch
Island Escape is a new collection from China Glaze for Spring 2011. When the first promo pictures were shown, I was, quite frankly, not excited. I was expecting all polishes to be sheer, and the only positive thing I could find was that I could skip it and focus on other wants. 

That was until I saw the first swatches... I fell in love with Papaya Punch, a bright orange borderline to neon. I must admit that my initial neon craze last year came to an end when I got a pink neon - I was satisfied and went onto other obsessions. I'm getting slightly obsessed with them again, so I allowed myself to invest in a few fun colours for Spring/Summer, and of course, Papaya Punch was the first to be bought :)

I know Papaya Punch is not a neon, but in my world it might as well be. I feel its colour is too bright for a creme, so I shall call it a creme with neon tendencies. It does dry with a gloss, though!

The best thing about Papaya Punch is the coverage. Two medium to thick coats and you're done... China Glaze deserves a huge applause for this ♥
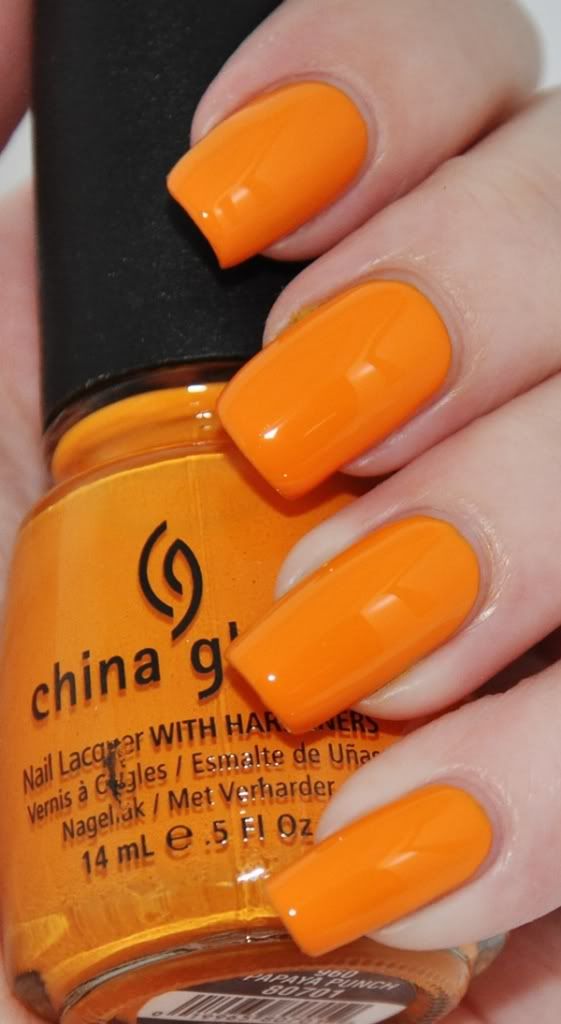
China Glaze Papaya Punch - flash

I'm wearing NailTek II, two coats of Papaya Punch and Fast Forward. This manicure is a total win in my book... I can't stop staring at my nails. I hope it'll be the first of many oranges in my collection! 

I know the general craze is about yellow this year, but if you ask me, it's all about orange. I might as well enjoy it and use the opportunity to buy a few more for Summer mani/pedis ;) What's your opinion on orange - and yellow for that matter?

♥ Vetten

onsdag den 27. april 2011

Nfu Oh #62 + China Glaze Visit Me In Prism

Easter has been amazing here, the weather has been warm, sunny and we've had lots of small barbecues, super yummy!

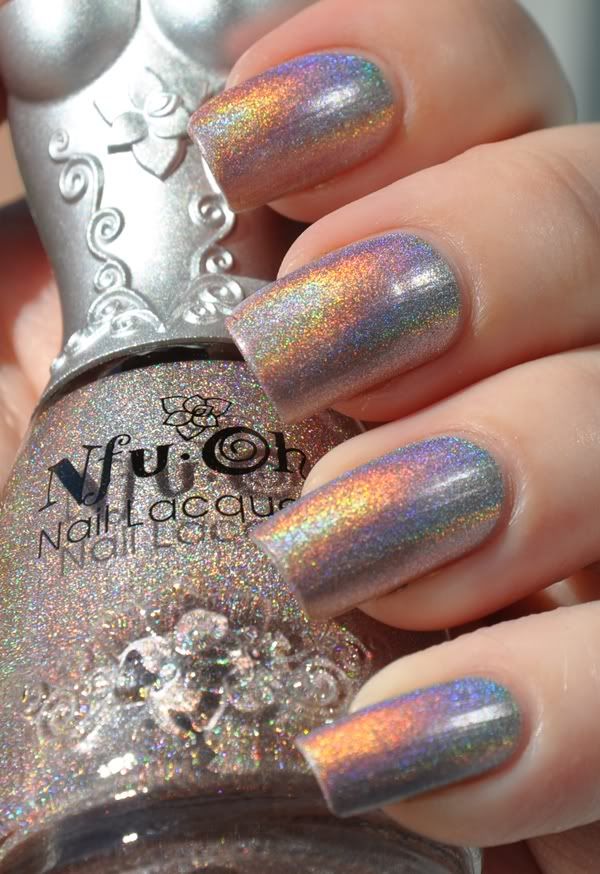
Nfu Oh #62, sunlight
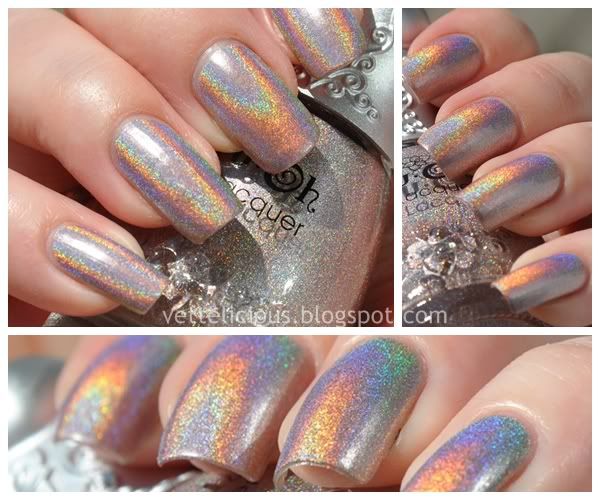
As for most of nail polish fanatics, a sunny day calls for something sparkly in my stash... Since I still have holos I haven't tried yet, I decided to try one; my very first holo from Nfu Oh - #62. It's a nude/champagne holo with a strong pink tone, very warm and flattering if a silver holo like Gosh Holographic makes your fingers go lobstery.

I tried it using two base coats; NailTek II Foundation and Gosh Fix Base Coat... and the difference was enormous. 

Applied on NailTek II, it was a nightmare I've never tried before - bald patches, pulls, you name it. It took me three coats and as few strokes as humanly possible for it to look decent.

On Fix Base Coat, however, it behaved a lot better. Two coats was enough, and I could be a bit sloppier as usual applying them, LOL! Promise me you'll invest in this basecoat or Nfu Oh's Aqua Base Coat if you try these super dense holos - it'll save you layers, trouble and annoyance! I can't emphasize this enough ;)


Here's a few pictures of #62 shining in the sun;

Nfu Oh #62, sunlight

Even though it's amazing, it's kind of dull inside. The nude colour make my nails look invisible, lol. Not so fond of these super-fine-particle-holos for everyday use :/ I spend too much time inside.

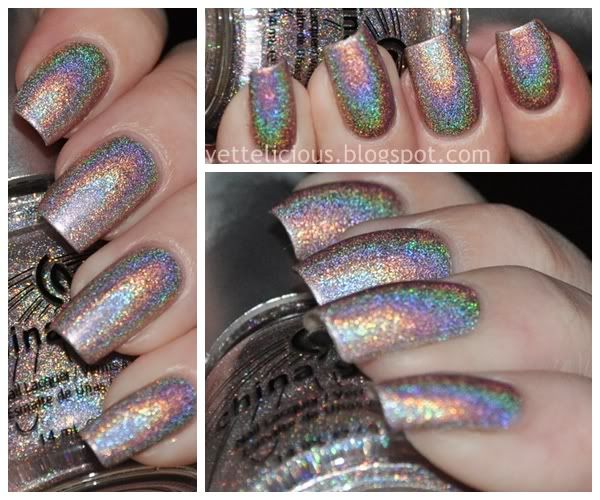
I decided to knock it up a notch with another similar holo, China Glaze's much coveted Visit Me In Prism. This polish was a total lemming for me, it's my ultimate favourite from the Kaleidoscope collection. A big plus in these are that their rough particles rocks inside too! :) I used one coat on top of #62. It's a shame I forgot to take pictures outside of this combo, it looks less phony/grainy IRL. My flash is trying to kill it, lol.

Nfu Oh #62 + Visit Me In Prism, indoors, flash

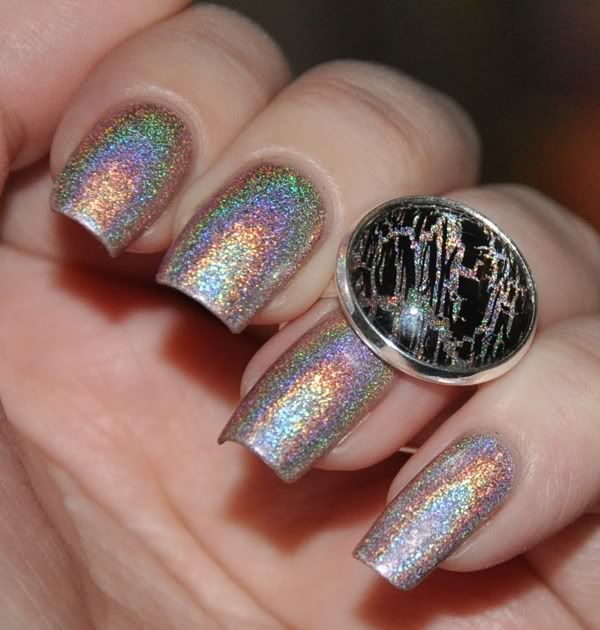
I'd better show the ring I made as well;


I love the combo!! Visit Me In Prism is quite sheer on its own I believe, so this huge bottle of Nfu Oh serves well as base, lol! Don't feel sorry for #62, it'll get the love it deserves on days I need something neutral for a day outside ;)

♥ Vetten
tirsdag den 12. april 2011

China Glaze : Octa Gone Wild (+ring!)

(I'm not good at updating these days and I'll tell you why: migraine. I found a recent NOTD post I wrote last week but didn't have the time to post. Hope you don't mind!)

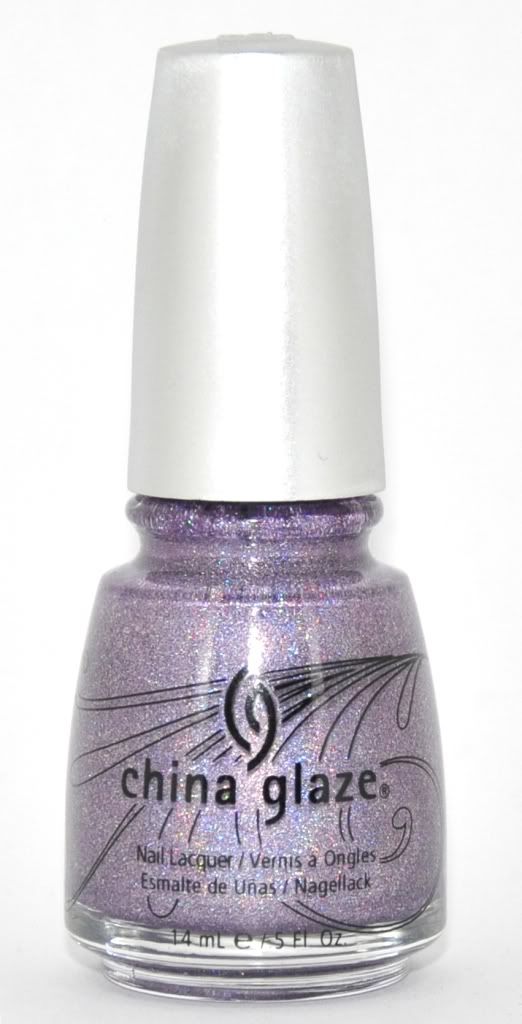
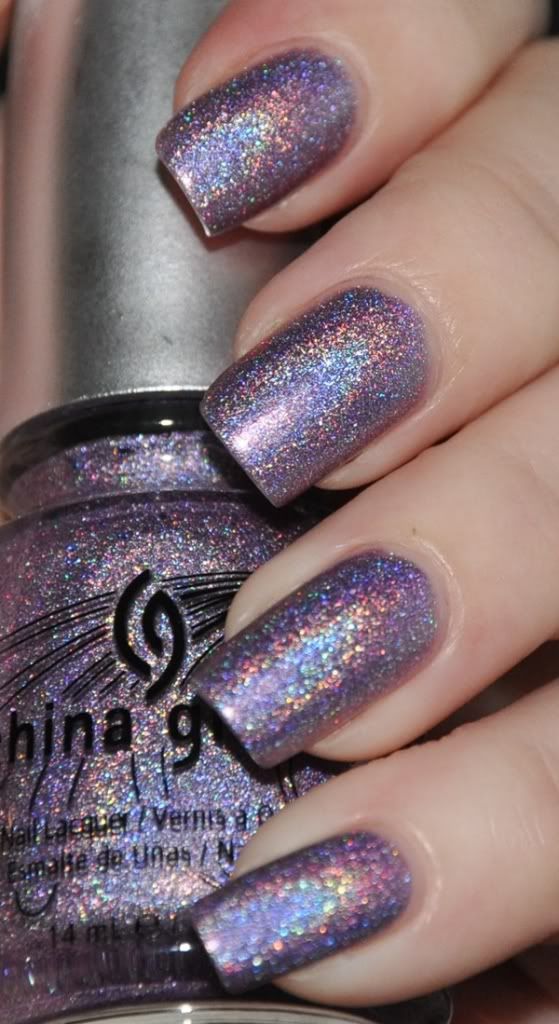
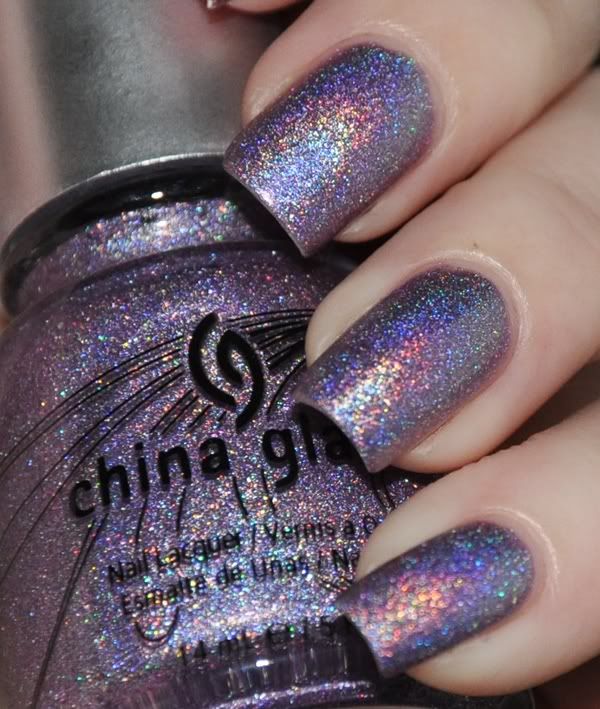
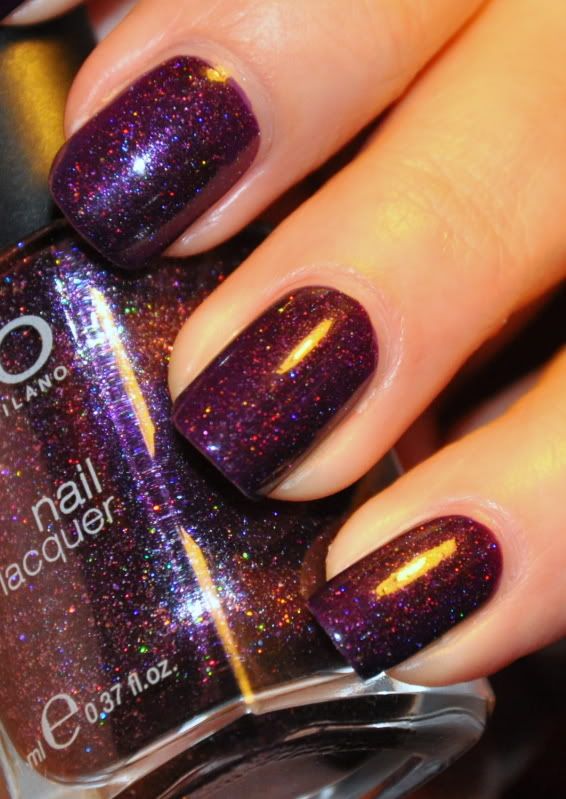
Time to show another glorious holographic polishes from China Glazes best collection ever - Kaleidoscope. This time you can feast your eyes on the wonder that's called Octa Gone Wild, a gorgeous linear purple. 

In the bottle, most Kaleidoscope polishes looks like a dull glitter, but fear not: once applied they will show off, even in dull light!

Yep, I'm a huge fan of these. I can't find anything wrong with them. They're quite covering, 2 coats doing the trick if you can survive a little visible nail line (and I can since it's only when the light is hitting it right), and the best part? They show their holo goodness inside, even with very low light. That's one thing I prioritize in a holo polish!


I'm wearing one coat of Nail Tek II, two coats of Octa Gone Wild, and I hadn't put on topcoat on all the pictures... I was afraid it would dull the effect, so I took a few pics before using it, and a few after... and the result was the same. 
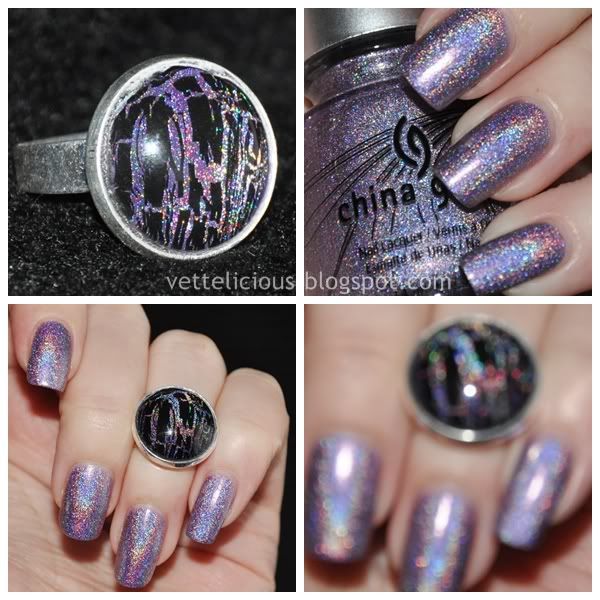
The pics with ring is with topcoat and the ones without is a mix, I think. 


I wore this colour for 3 days without chips, just very minor tipwear. For any lacquerhead, that's a while, right?! LOL


Instead of wasting your time reading my boring opinion, let's skip ahead to what really matter... Picspam!

China Glaze Octa Gone Wild

China Glaze Octa Gone Wild

China Glaze Octa Gone Wild

For once, I decided to go nuts with pictures. Recently, I've begun to think about the appearance of my posts - is it getting to the point where I blabber on about boring details and not showing enough pictures? LMK in the comments, I appreciate your honesty on this matter.. I don't want to bore you to death! :)

I cheated a little... You might not notice it, but the ring is not made with Octa. It's OPI DS Original, a polish which I have yet the pleasure of wearing (saving it for another sunny day). But I think it suited the mani quite nicely anyway ;)

♥ Vetten
lørdag den 9. april 2011

Shattered Candy - OPI / China Glaze crackle mani

Let me start this post by saying that I'm definitely not fed up with crackles just yet. For me, crackle polishes are here to stay. It's a "new" type of finish, just like I'm still loving matte manicures, suede finish, you name it. I just wear whatever floats my boat, LOL!

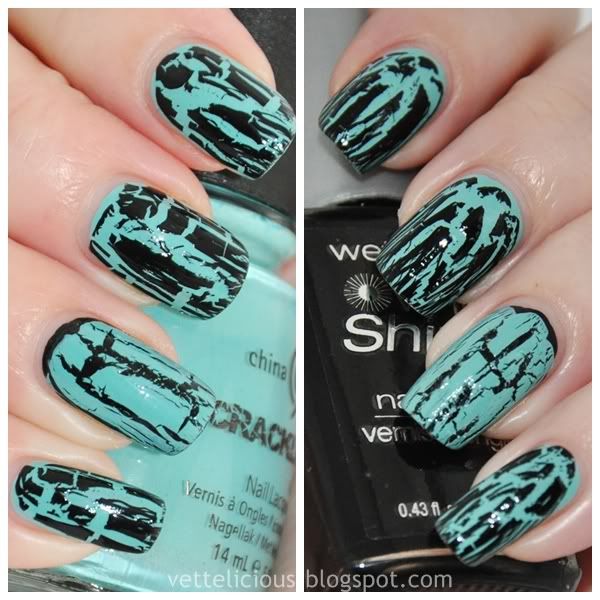
I recently made a bunch of crackle rings, and I decided to match my manicure to one of them. I'm wearing four polishes: China Glaze For Audrey with OPI's Black Shatter and Wet'n'Wild Black Creme with China Glaze Crushed Candy.

It took me one, thick coat to mostly cover my nails with For Audrey, and Black Creme is a one coater even with a thin-ish coat, so it was a fast manicure overall. I had a few issues getting Crushed Candy to crack right, but I think it's because it has thickened a bit. 

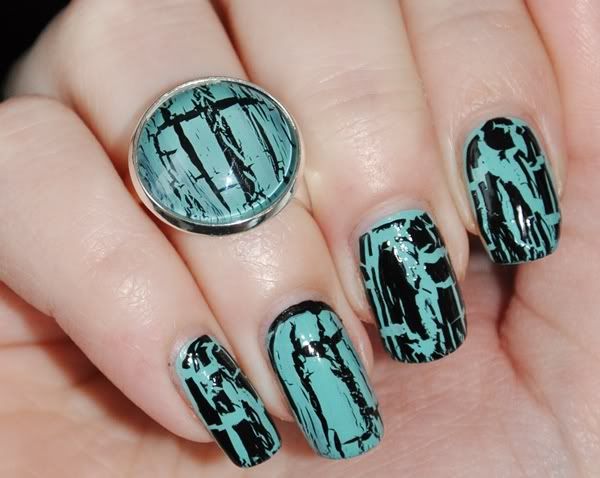
I'm including a picture of both hands, and I must say I like the result on the right hand the most (the picture on the left). Big crackles are so beautiful; it really shows the colour underneath it!

Shattered Candy - OPI / China Glaze crackle

And here's a picture of my right hand with the matching ring :)

Shattered Candy - OPI / China Glaze crackle

That's all I have for you today!

♥ Vetten
søndag den 3. april 2011

China Glaze : Rated Holographic (+ matching ring!)

Today I want to show you my new love. 

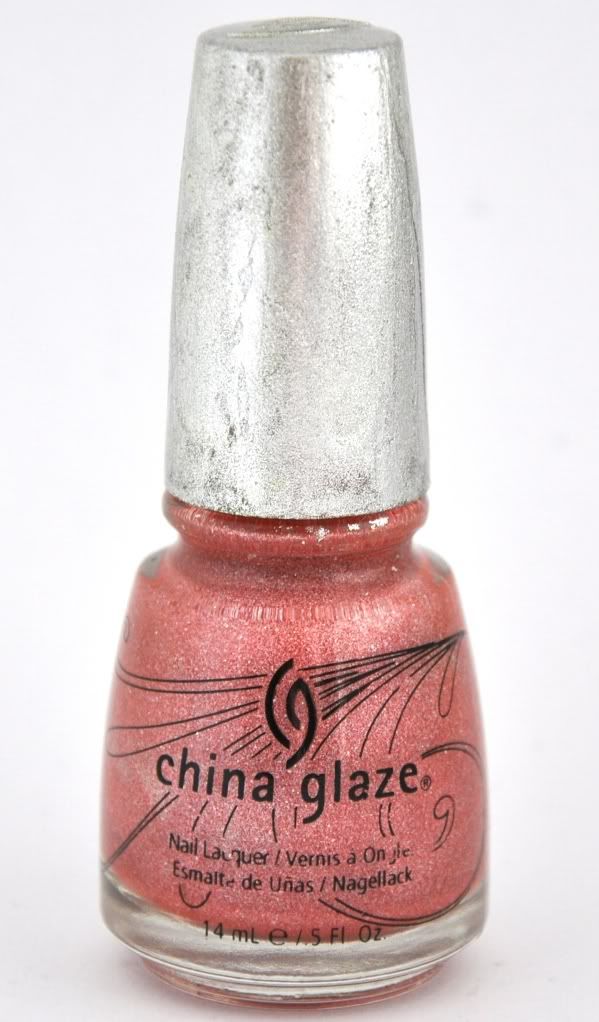
China Glaze Rated Holographic
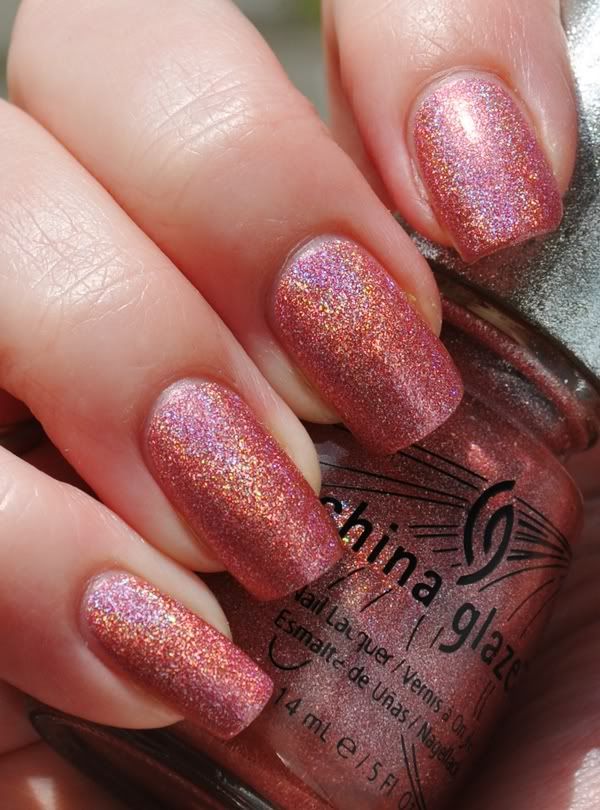
I have no idea why I never gave China Glaze Rated Holographic a chance until now. And truth be told I ordered it in the belief that it would be a rusty, red holographic - which isn't quite right (even though my bottle picture shows it as a hint too red. It's more true to the ring pictures).

Rated is from China Glazes much coveted Kaleidoscope collection. I have quite a few of the colours myself, but I have put off wearing them until the sky clears and I can enjoy them in their full glory. The thing is... Rated is gorgeous even on a cloudy day. Heck, I didn't even mean to be wearing it, I was supposed to swatch a few colours and started with applying Rated on four nails. It quickly made it's way onto the last six, and before I knew it, I was making a ring to match it as well.

I used my regular base coat, NailTek II, 2 coats of Rated and no topcoat this time. It dried really fast and with a satin kind of finish - where have I been living the past months during the holo craze around the blogs? I thought these were rough to the touch! - and so I left it for once and saved a few drops of top coat, LOL!

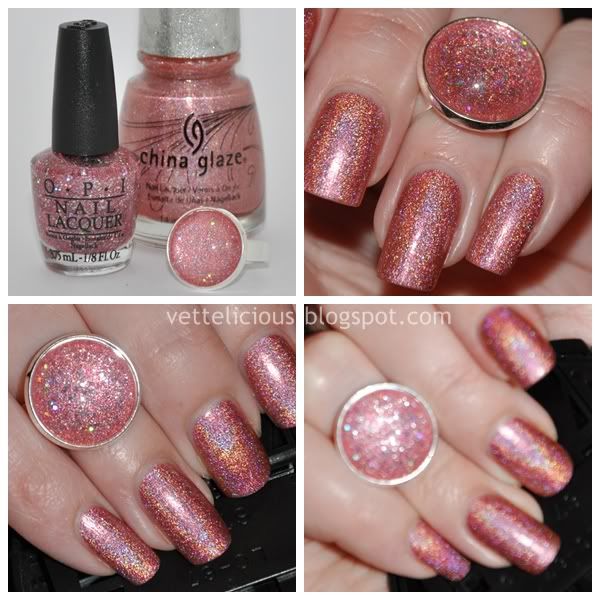
Why did Rated surprise me so? It is very similar to OPIs Teenage Dream, and I'm surprised I haven't seen any manicures with these two paired in blogland. Come to think of it, Rated is gorgeous on its own and I didn't even want Teenage Dream on top of it except in the ring to give it more bling, so that might explain it.

China Glaze Rated Holographic - outdoors, direct sun
 The above picture shows rated a tad too red, again - it is really more the colour of the following pictures:

China Glaze Rated Holographic - indoors, flash

If you've noticed the vintage worn looking lid on Rated, you're spot on: it isn't the original foil. It's such a silly thing, but when Rated arrived it was covered in Laser Lime (which sadly didn't survive breaking it's neck. Tragedy!) and the silver foil was gone, making the lid looking like yellowed plastic. I love this polish so much that I decided to used a silver foil polish to paint the lid and sealed it with ChG Fast Forward. Yep, I'm very silly like that. I'm a perfectionist in many ways, and I wanted Rated to look as gorgeous (as possible to remake) as the other 7 Kaleidoscope polishes I have.

Do you like this colour? I don't think I need to repeat myself, but I was really surprised when I tried it. It's amazing! I'm already in the process of ordering a spare bottle of this beauty. I must admit that I'm beginning to like the Kaleidoscope holos far better than OMG holos.

On another note, expect to see rings with many of my posts from now on. Initially I wanted to make a post showing them all, but as I'm always making new ones I decided it'd be much more fun to spice up my plain-looking-manicure pictures.

Also, a huge thank you for following ♥ I went online today to see there's a staggering 300 of you now, wow!! Needless to say, I am very flattered you guys follow my nails' life :)

♥ Vetten

søndag den 13. marts 2011

CA #803 aka Bellsprout vs. L8R G8R - a green holo comparison

Another excuse to flash Bellsprout again! While no-one asked for a comparison, I did one for myself ;) I was curious to see the two compare.

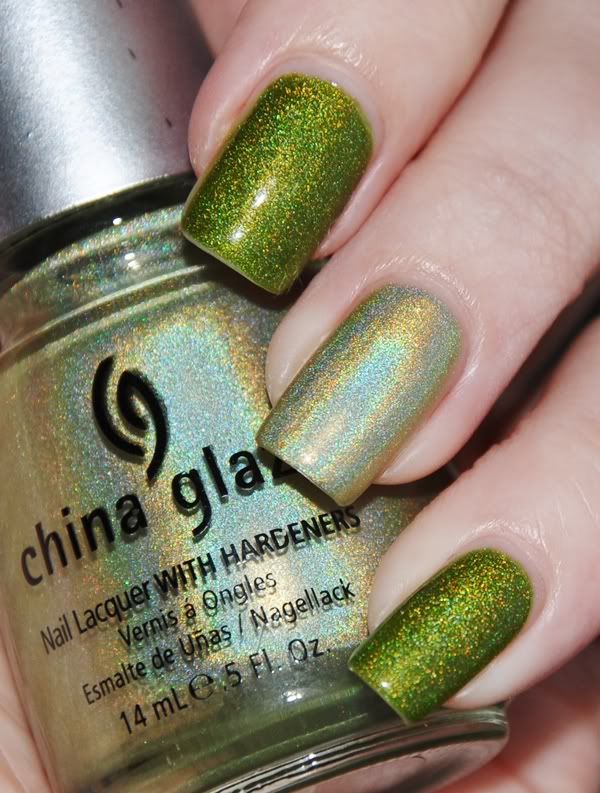
I used one coat of OPI Greenwich Village and two coats of Bellsprout (CA #803) on my middle and pinky.
On my ring finger I used 2 coats of China Glaze L8R G8R (from the OMG collection).
Catherine Arley #803 vs. China Glaze - L8R G8R
In this picture, I have been wearing Bellsprout for 5 days. Amazing lack of tip wear, eh? I'm beginning to love Catherine Arley holos more and more!

While it's easy to see they're no match, I'm curious to know which of the two you like better. Bellsprout is without doubt my favourite, it goes much better with my skin tone than L8R G8R - but if you go for the most linear holo, L8R G8R is the winner. As for now I'll stick with Bellsprout, but maybe when (if!) I get a little colour on my skin this Summer, I'll try L8R G8R again.

Even though the Tronica collection is like nothing I hoped for, I might be hunting down Laser Lime. While I doubt it'll be no match for Bellsprout, I've come to the conclusion that the base colour of the holo matters more than the effect, and I'm willing to give it a chance :)

♥ Vetten

tirsdag den 8. marts 2011

Illamasqua Raindrops - a quest to find the perfect base

Yes - I went on a quest to find the perfect base for one of my pretties!

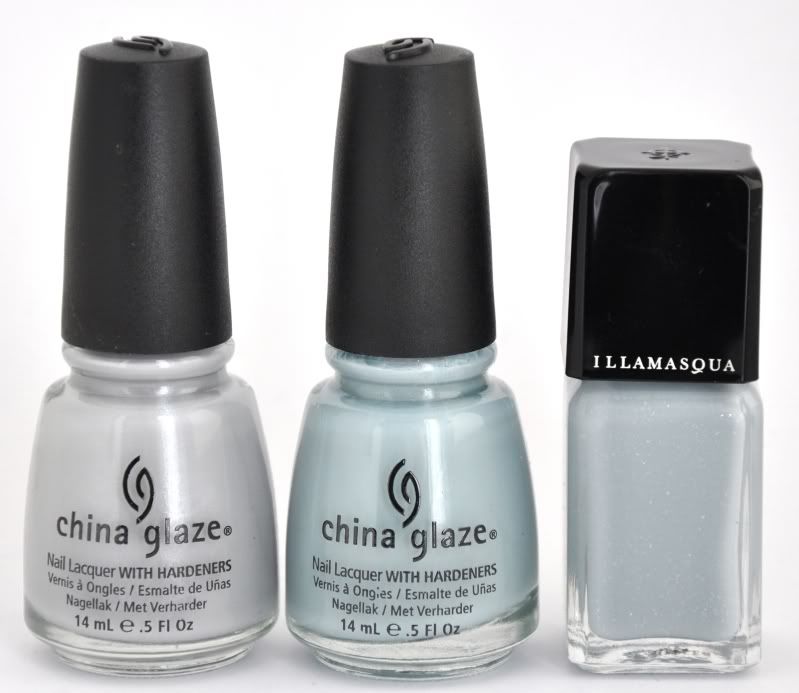
ChG Pelican Grey, Sea Spray and Illamasqua Raindrops
I adore Raindrops. It's a gorgeous sheer grey jelly-creme base with small, random sized white flecks scattered in the base. It's a unique polish in my collection, and I haven't seen anything like it. 

It was one of three winners in Illamasquas competition last year, giving the winners the opportunity to create their own colour. An amazing opportunity for a nail polish fanatic, yes? :)

However, I get the impression quite a lot of people were disappointed with Raindrops because of its sheer-ness. I knew this when I ordered it, I still bought it as I was madly in love with it. At the time I didn't know how hard it would be to find a perfect base colour! 

Raindrops is a soft, ever so slight blue-toned light grey. As luck would have it, China Glaze included two soft greys in their Anchors Away collection - Pelican Grey and Sea Spray. Having just received Pelican Grey, I grabbed all three bottles and started testing! Initially, I also tested Raindrops over Recycle, but I couldn't make it work - Raindrops would be streaky and Recycle is more leaning towards yellow brown than blue so I don't think it's that good of a match - but at the time Raindrops was released there wasn't so many soft greys out there with a blue base (I don't know of any) so back then I completely understand people opting for Recycle.

Anyway, on to the swatch! While Raindrops over Pelican Grey might look streaky, it wasn't - it's the reflection ;) From top to bottom: Sea Spray + Raindrops, Pelican Grey + Raindrops, Sea Spray + Raindrops

Sea Spray + Raindrops, Pelican Grey + Raindrops, Sea Spray + Raindrops

All 3 nails are two coats base colour and one coat of Raindrops. I just knew Sea Spray would be perfect ♥ Sea Spray is my chosen colour of this season, it's an amazing colour and perfect for layering!

If you love Raindrops in the bottle, it's now very much possible to achieve without too much of a hassle - and you save your high-end polish too :) Hope this was useful, even if only a little. LMK what you think about Raindrops!

♥ Vetten
mandag den 7. marts 2011

Spellbound - a lemming is killed

It was a real steal, too! :)

This colour has been haunting my wishlist ever since I got into nail polish and particularly international brands. It was released one year before I bought my first China Glaze polishes - which oddly were the 2010 Halloween specials! 

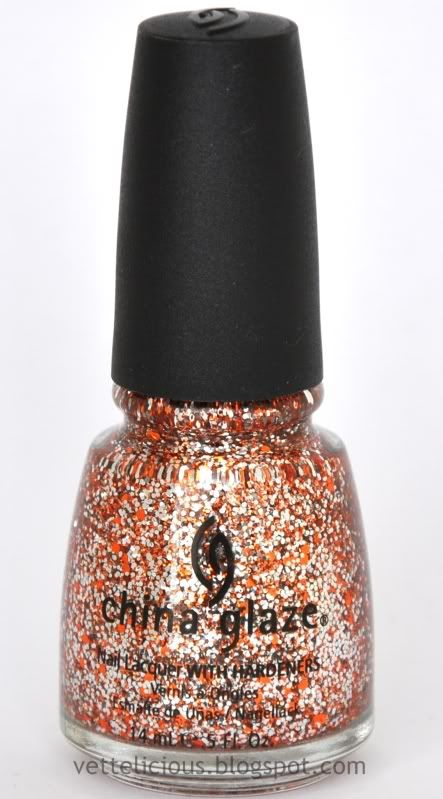
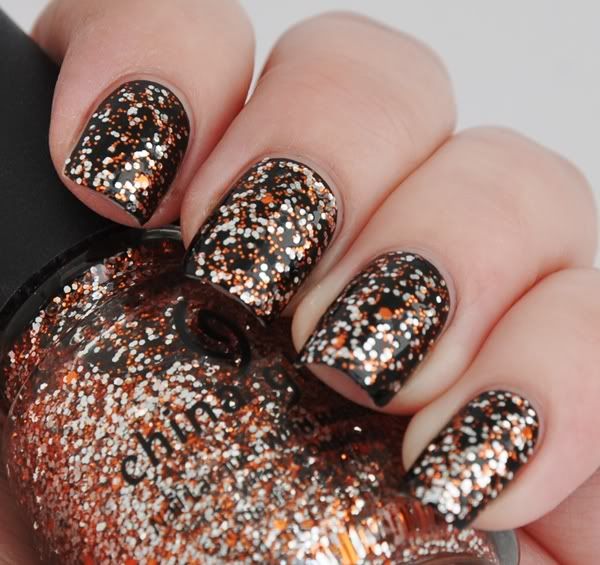
China Glaze Spellbound
Spellbound was released in a set of four polishes for Halloween 2009 by China Glaze. It was sold with Liquid Leather, White Out and Ghoulish Glow (all of which I have, but haven't used as of yet. I really only got this set for Spellbound).

It is a clear base packed with orange and silver glitter in all kinds of sizes - there's even a few big orange hex glitters thrown in here and there. I believe it was intended as a topcoat, but it is so dense you will have no problem making full coverage with three or four layers, I think. I haven't tried it yet though :)

So... What's all the hype about this polish, you say? I think it's a very different take on a halloween polish. At first sight it looks a little tacky, but on the nail it's gorgeous - and very much full of bling! I couldn't stop staring at my nails wearing this ♥ I will difinitely be using it outside of the Halloween Season although I can't wait to make a manicure with it next year in October.

For my manicure I decided to wear it as topcoat over a black creme - my ever so faithful one-coater, Black Creme from Wet'n'Wild. I can't express how much I love this cheap black as base for my glitters, but I can say it's definitely worth the money. It's also great for frankens!

I used one coat NailTek II, one coat Black Creme, one coat Spellbound. I believe I used a coat of Fast Forward, but I honestly can't remember. Spellbound will dry a little gritty so a coat or two of top coat is highly recommended to smooth the finish and make it last longer.


China Glaze Spellbound

While Spellbound is an amazing colour, I must say it was hard to photograph. I had to tilt my fingers a bit which explains the different angle the picture is taken it. And of course I forgot to wrap the tips this one time. D'oh!

I have to try Spellbound over other colours one day - it would look fun over China Glaze Peachy Keen, I think. And a bit more diva-like on top of a white creme. The possibilities are endless - especially within the orange spectrum of colours!

Do you have Spellbound, or do you want it? Do you think it's as amazing as when it was released, giving that we have had an amazing flow of glitters ever since? Personally, I think this is a winner in every collection - even in a sea of glitters, it's super unique ♥

♥ Vetten

onsdag den 2. marts 2011
Office Polish-tics and Crushed Candy (a crackle mani)

I received a wonderful package with nail polish the other day. I had ordered 4 back-up top coats, a few cremes and the new China Glaze Crackles! Today I'll be showing you the first I tried which is the colour I was most excited about.

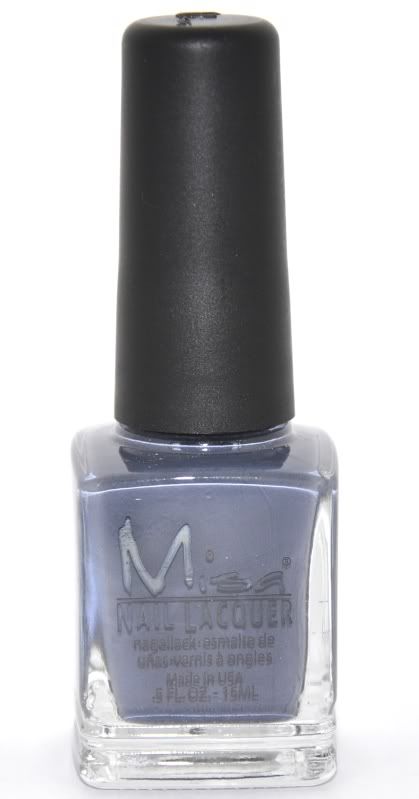
Office Polish-tics
As the base colour, I used one of the new cremes - Misa Office Polish-tics. Excuse the horrible, horrible over exposed picture to the left, I must've left my photographic skills (the few I have LOL) in my polish drawers.
Office Polish-tics is a dark blue-based grey (more dark than the bottle shot). It's gorgeous on it's own, but a bit too dark for me at the moment. I'm all about layering polishes right now, and it makes my fingers itch to see a perfect, gorgeous dark creme on my nails. I can't help but make them flashy!

I used two coats of Office Polish-tics. If you're better at applying than me (which is almost impossible not to be - one day I have to show you how my nails look without clean-up and topcoat to even out the coats, LOL! It's embarrasing!), you can get away with one, thick coat. Especially if your nails are shorter - mine are getting a length where I can't avoid bald spots even with a one-coater. Again, I'm terrible at applying even coats.

This is the first Misa polish I try, and while I love the long handle and the square bottle, the brush is extremely small and it takes so many strokes to cover my wide nails. Office Polish-tics had a great formula and with an OPI wide brush it would've been perfection.

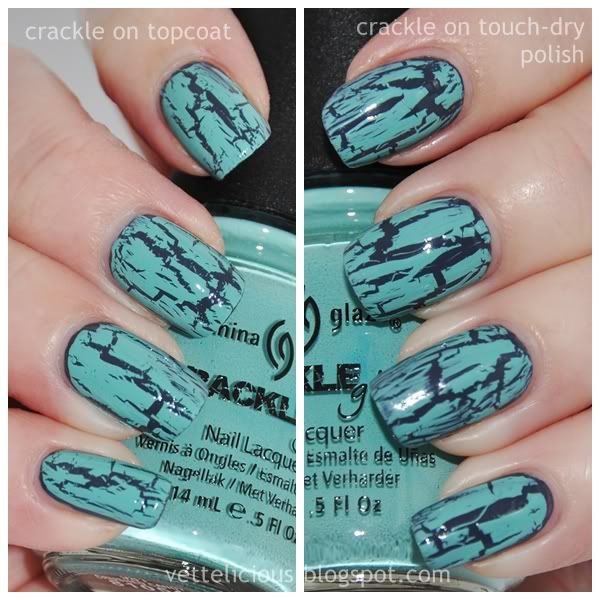
Anyway, onto the crackled part of the manicure. Since this is my first test with China Glaze's crackles, I wanted to try using it in two different ways, so I applied one coat of China Glaze Fast Forward on one hand and left Office Polish-tics to dry alone on the other. This results in different crackles, and I guess it's a matter of taste and preference which is better.

Crushed Candy over Office Polish-tics
Personally, I prefer the result to the right - crackle glaze over a touch-dry (but not dent-safe!) polish. I just love the strings it creates! I used a thick coat of China Glaze Fast Forward on top of the crackle, but two regular coats would make the finish more even (again, this is my preference. Others may like the different levels).

How does China Glaze's crackles compare to other brands?
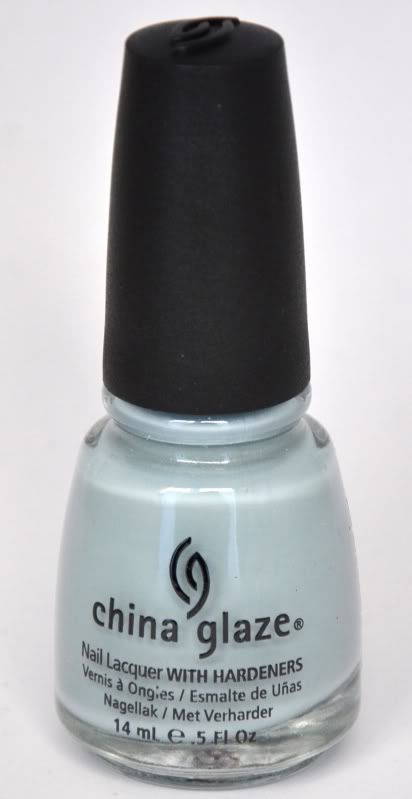
In my opinion, the thin brush is a little harder to work with compared to OPI's wide brush. It takes me 3 strokes with ChG's, and overlapping is inevitable for me. I do want to add that ChG's crackle are more opaque (at least this one is) than Depend's, and it means they're easier to use over dark base colours. Not to mention that I am loving the colours China Glaze did! Mint-blue, pink, grey, white, these are perfect for spring!

I hope you guys are not too tired of the crackles just yet, I have a lot of combinations planned with these ;)

♥ Vetten

mandag den 21. februar 2011

China Glaze - Sea Spray

While I'm sure many of you are getting tired of seeing the Anchors Away collection, I hope you can bear with me ;) In general, I'm a bit late with most collections. It takes time for the bottles to travel all the way to Denmark, and even longer before I get to them in my never-ending stash of untrieds! Besides, I never buy a polish because it's "in", or just because I want to flash it while it's new, so all my polishes are equal in that matter - I wear what I feel like, not what the current trend tells me to. Of course I'm influenced (and tempted) by all the new shades in each collection, but then it's because of the colour itself and not the in-factor. I'm sure most of us feel that way :)

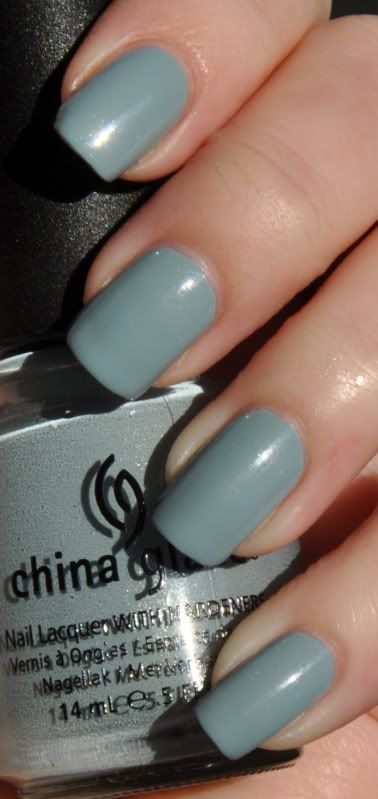
China Glaze - Sea Spray
I was really looking forward to Sea Spray, all the swatches around the blogs had me swoon over the gorgeous yet hard to describe grey-blue shimmer. I'm not sure if it's a baby blue with grey in it, or a light grey with blue in it. In the end it doesn't really matter, does it? Sea Spray didn't disappoint me in real life; it's a really gorgeous colour.

The shimmer in Sea Spray is amazingly hard to capture. I gave up trying, but you might be able to see some teeny tiny shimmering particles in the picture, but don't despair if you don't - it's not that visible IRL either!

When I received Sea Spray I immediately thought of another blued grey I have from a brand called Nilens Jord - swatched here. While #666 from Nilens Jord is definitely a lot darker, they share some resemblance - they both have subtle shimmer and the blue tone. I think they'd work amazing together in a manicure, so I will have to try those together one day :)

I used one coat of my base coat NailTek II and two coats of Sea Spray. I didn't use a top coat as I was playing with Black Shatter :)

While I'm very satisfied with the colour and opacity of Sea Spray it does bring out the red in my skin tone :/ I really wish it worked better with my colour, but I will still be using this colour a lot - I will have to make it work ;) Ever felt this way about a polish?

For once I didn't take the manicure-picture in my lightbox - the sun was shining bright and I was desperately trying to capture that elusive shimmer!

China Glaze - Sea Spray

What's your thoughts about Sea Spray (and all it's cousins from other brands)? Are you excited about China Glaze's Anchors Away collection? As for me, I didn't find too many I couldn't live without - but colours like Sea Spray are worth getting a spare bottle of, so my wallet is happy about that fact :) In general, it seems like greyed out colours are here to stay, and I'm thrilled with it! 

♥ Vetten

fredag den 11. februar 2011

Review: Nailtopia nail strips and a flash of Teenage Dream from OPI

Today's post is going to be a bit picture heavy, but I hope you don't mind ;) I have a lot to show you!

China Glaze - Something Sweet & OPI - Teenage Dream
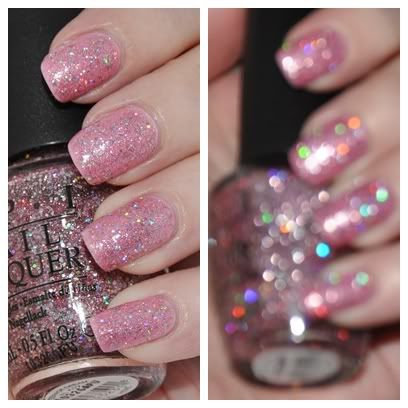
Firstly, a gigantic package arrived earlier this week and from the 20+ polishes I got I'll be showing you two of them today. For the glittery result you see below I used the two polishes to the left: China Glaze - Something Sweet and the glitter is my favourite from OPI's collab with Katy Perry - Teenage Dream.

I used two coats of Something Sweet and two coats of Teenage Dream. Teenage Dream is a very dense glitter, it's base is pink and very thick but still manageable. In my experience OPI makes some great glitters and TD is certainly one of them. I can see it being pefect for light, summery manicures and I will definitely be using mine more as the weather gets better ;)

I took a picture in my lightbox of the result and it really washed out the holo effect of the glitter, so I decided to do a blurry shot so you can see why this glitter is so amazing :) 


I'm pleased to say it's everything I dreamed about after seeing the promo pics/video last Winther. I had high expectations, but I was counting on it being necessary to use a base colour, so that doesn't bother me.

ChG - Something Sweet & OPI - Teenage Dream
My only issue with this is not the polish' fault.. I'm really disappointed to admit that this colour combination isn't "me" on it's own - it's a bit too sweet looking. In general, warm pastel colours doesn't fit my style or skintone, so I usually steer clear of pale purple and pink, but I wanted this to work so hard that I took the chance anyway. I'll be trying it with a darker base next time, perhaps a dark purple or blue.

Anyway, I wasn't going to give up with this manicure. To my luck I had just bought a spare of my one-coat black creme - Wet'n'Wild Black Creme, and I received a package from Nailtopia with some products to review, and what better time to have some fun with stickers? :)

Here's the product I'll be reviewing:

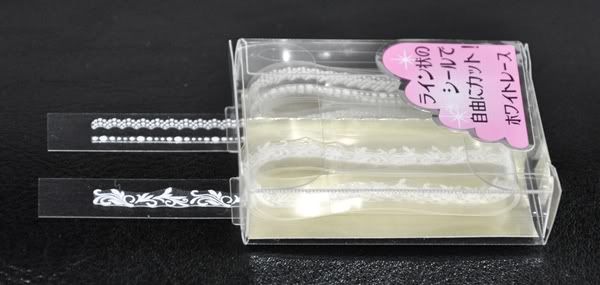
Nailtopia Nail Strips Design LS-4

At 3.49£ a package, you get 3 x 30 cm strips. While I am usually very cheap when I buy nail stickers, I'd say this box is a good deal - I used approx. ½ of one strip, meaning there's enough for up to 6 manicures (depending on how many strips you want per nail ofc). And the quality is very good - they are self-adhesive and rubber-based, so you can stretch them very carefully if you cut them a few mm too short or just want the desired design to fit your nails. I was very impressed with this once I learned how to manage them with my clumsy fingers, LOL! And it's quite easy to measure how much you need, you can do this while the backing is still on.


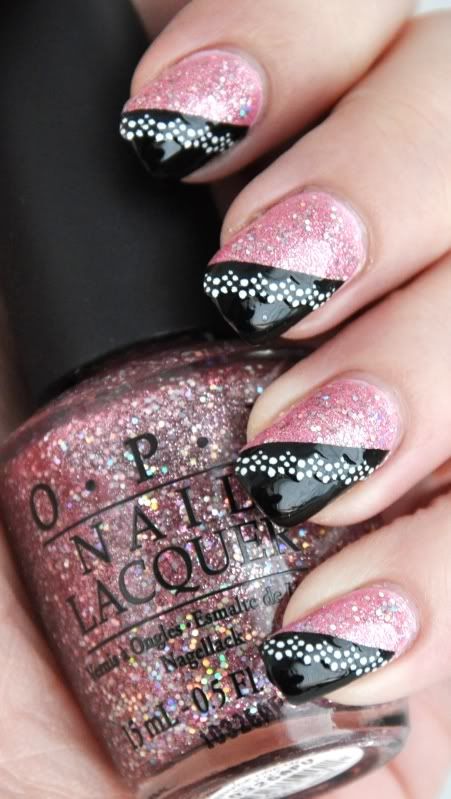
Here's the result on my nails!

ChG - Something Sweet, OPI - Teenage Dream, WnW Black Creme & Nailtopia nailstrips
I love it! I topped it off with China Glaze Fast Forward to prolong the wear of the nailstrips/stickers. I'd suggest using two layers of topcoat if you want the sticker to be completely invisible, but since I'm already wearing 9 layers on my nails including all colours and base coat, I called it a day with one.

What do you think of Teenage Dream, and how do you like the design I made? :)

♥ Vetten

The nailstrips used in this post was received for review. This does not affect my opinion in any way.

tirsdag den 1. februar 2011

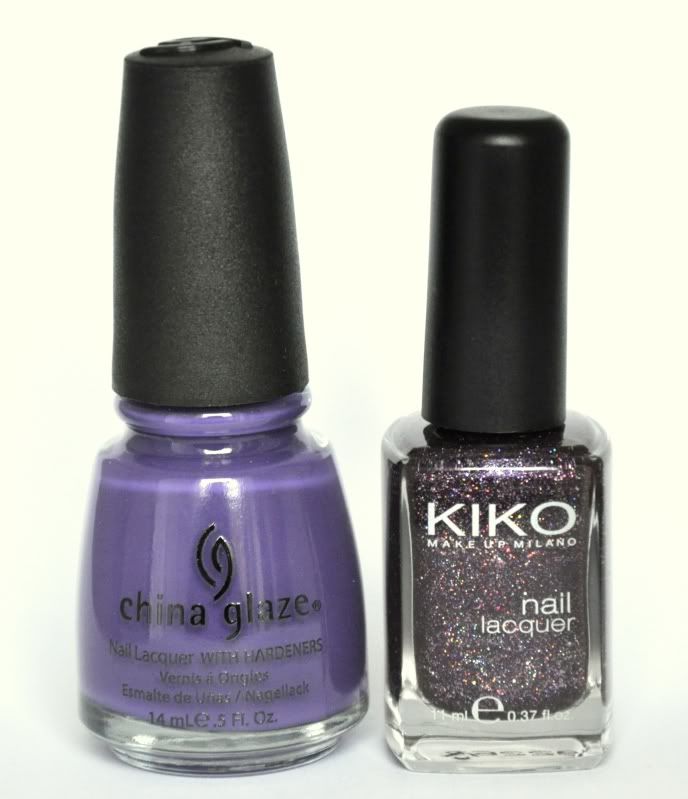
Kiko #255 Purple Microglitter

Today I want to show you a fantastic purple combination. I'm loving this simple, quick manicure so much that I'm thinking about wearing it forever! If only I could lol, I know temptation is just a corner away ;)

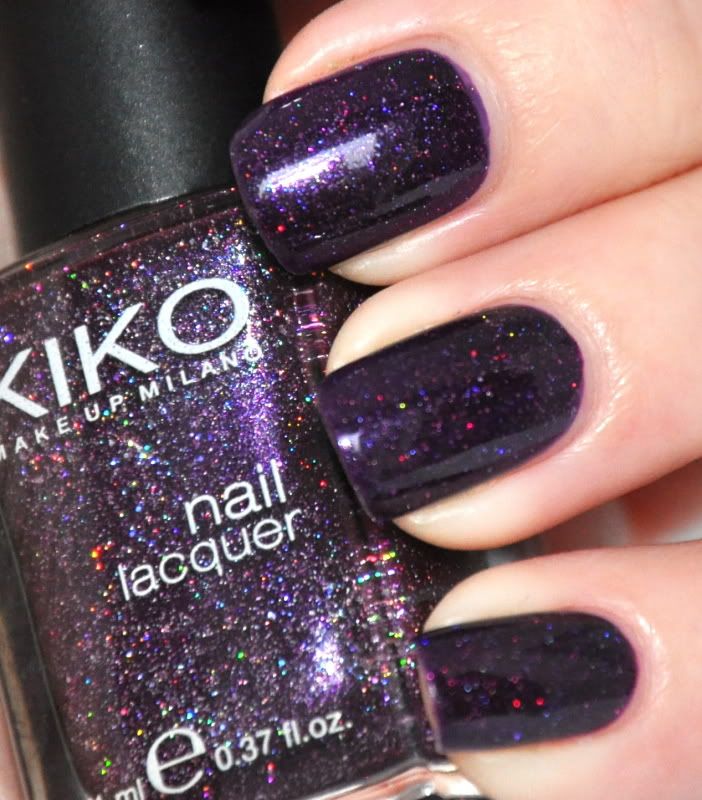
CG Grape Pop & Kiko #255
Quite a while ago my friend in Germany bought some KIKO nail polishes for me - this was one of the ones I was most giddy about, and I finally reached for it and decided to give it a go.

The reason I hadn't done so earlier, is that I needed a good, purple base and the ones I had were too cold. Having recently purchased China Glaze Grape Pop, I tried to match them - while Grape Pop is still a tad on the cold side, I found that it doesn't matter as #255 warms it up anyway. I guess I finally learned it doesn't really matter unless the top colour is a very sheer polish!

The picture on the left shows #255 way too cold, but I had trouble finding the true hue in my lightbox (and in all kinds of light, actually. My camera doesn't seem to want to pick it up). That's also why I decided to include a non-light-box picture of the result, as the true colour is closer to that than on the first pictures.


As much as I love this polish, I'm really disappointed it doesn't have a proper name. I'm bad with numbers and had to reach for the bottle in order to write this post - and this polish is in my top 20! On Kikos website, it's described as Purple Microglitter, which will be it's name until I can think of a better nickname for this pretty. God knows it deserves it!

I started with one coat of basecoat, Nailtek II, added one coat of Grape Pop, then one coat #255 and lastly tried out my new top coat, Fast Forward from China Glaze, which I'm very impressed by. I will do a post about my basic stuff one day, but for now let me just say that it's a great substitute to Seche Vite.

I wanted to limit myself to one picture of the result as I do most of the time, but I found it so pretty that I couldn't narrow it down from the last two. I also added a picture taken in yellow evening light, to show you how warm this purple really is.

Kiko #255 - Purple Microglitter, natural sunlight

Take one look at the amazing sparkles on my ringfinger and tell me you're not in love ♥

Kiko #255 - Purple Microglitter, natural sunlight - close-up.
And lastly, a picture to show the warm purple it flashes most of the time ♥

Kiko #255 - Purple Microglitter, artificial yellow light - close-up.
Holographic sparkles made my day! A real pick me up when I needed it. This'll be my go-to colour for days where I need that little smile ;)

I sure hope this post wasn't too long for ya, kudos if you made it to the end :)

♥ Vettelicious

fredag den 7. januar 2011

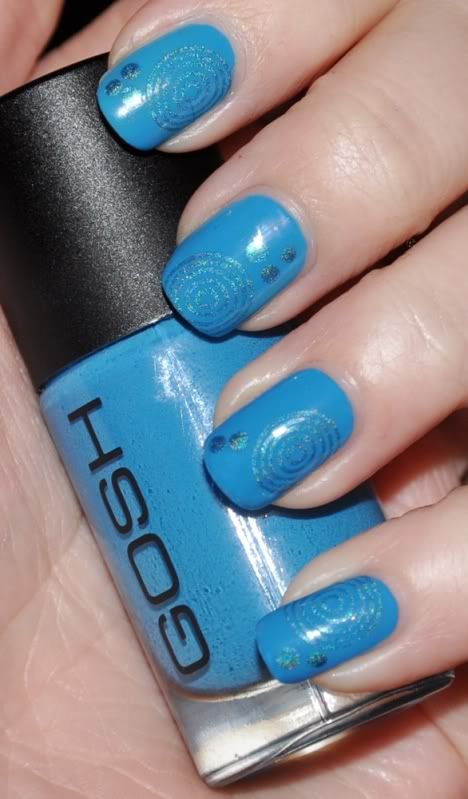
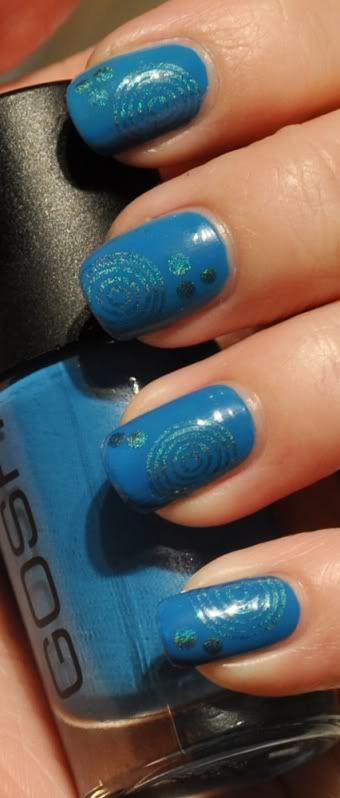
Simple manicure: Gosh - Gypsy Blue, CG DV8 & Essence Image Plate

Gypsy Blue is by far the prettiest and easiest creme I've tried from Gosh. It's easy to work with, has a great formula, very opaque meaning you can get away with one thick or two thin coats, oh, and the colour itself is gorgeous.

This is my go-to colour when I want to make an easy, painless manicure or just feeling like a popping blue on my nails. The colour really pops - it's the perfect basic blue IMO ♥ Looking at this colour throughout the day really cheers me up!

For this manicure I wanted a little bit of sparkle as well as some stamping. I recently organised my plates, meaning they're easier to reach and choose from, so I think I'll be using more patterns from now on.

China Glaze's DV8 came to mind as well as my favourite random pattern, circles from an Essence image plate I have. I think the result is a fun little extra on that beautiful blue I love so much, and I put on some dots of DV8 with my dotting tool to make the pattern more complete :)

Gosh Gypsy Blue, CG DV8 & Essence Image Plate

Gosh Gypsy Blue, CG DV8 & Essence Image Plate- no flash for extra visible holo

Here's what I used:
Besides my base coat, NailTek II, I used two coats of Gypsy Blue.
Then I stamped and dotted DV8 randomly on the nails, and finished with a coat of Seche Vite :)

♥ Vettelicious

lørdag den 25. december 2010

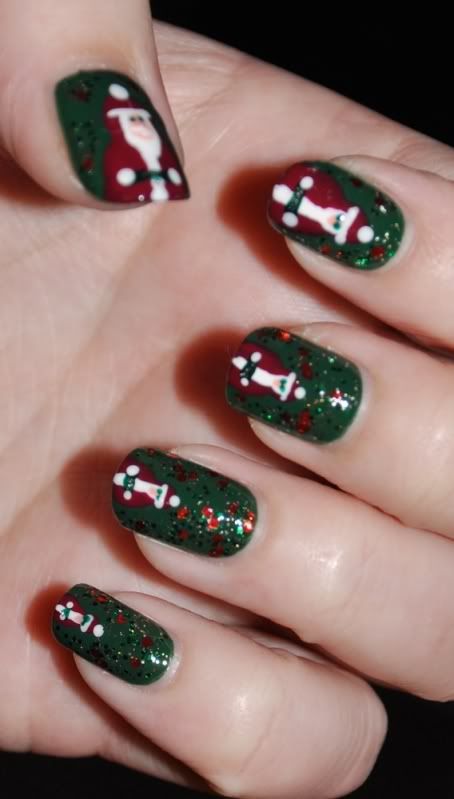
Merry Christmas! + Matryoshka inspired nails

Merry Christmas, everyone! ♥ 

Hope you had a wonderful evening/morning, spending time with your loved ones.


I was celebrating with my fiancé Jesper, my mom, dad and brother. We had a wonderful evening and there was so much food and so many presents! Nothing nail polish related, so I won't get into details ;)

I wanted to make a special nail design for the special occasion, and I have been thinking long and hard about what I should do. It wasn't until the 23rd Dec I finally decided on a design - I took a look through my Christmas decorations and decided to do a manicure inspired my some of my favourite decoration: Matryoshka (aka Babushka) Santa dolls!

Christmas manicure inspired by Matryoshka dolls

Christmas manicure inspired by Matryoshka dolls

Christmas manicure inspired by Matryoshka dolls

Vettelicious

tirsdag den 21. december 2010

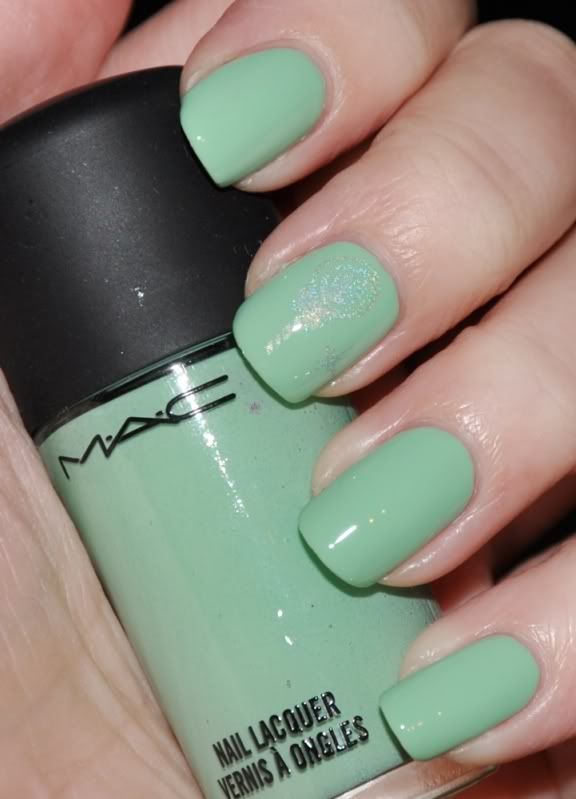
MAC - Peppermint Patti

Yay, one of my lemmings arrived! I've wanted this since I saw it on Neglenymfernes blog a long time ago.. A few months ago I decided it was time to let the hunt begin. I've been stalking ebay for 3 months waiting for a good deal, and finally!

It started out as an auction with a really sweet seller, but when I wanted to make a bid I couldn't because of the bidding settings. She hadn't checked to see if they allowed international bidding even though I asked in advance. The auction ended with only one bidder and I was gutted, as it ended way cheaper than I would've paid lol. So I wrote the seller and said that I was sorry I couldn't bid but that it was okay, and told her if the buyer never paid I would love a second chance.

Guess what? The winner didn't pay (and I really wonder why! It was cheap, even shipping was cheap, and the colour... who doesn't want this pretty? :0 I'll probably never know LOL). It arrived within a few days even being so close to Christmas, so I decided to try it out instead of my Christmas polishes! Can you blame me? ;)

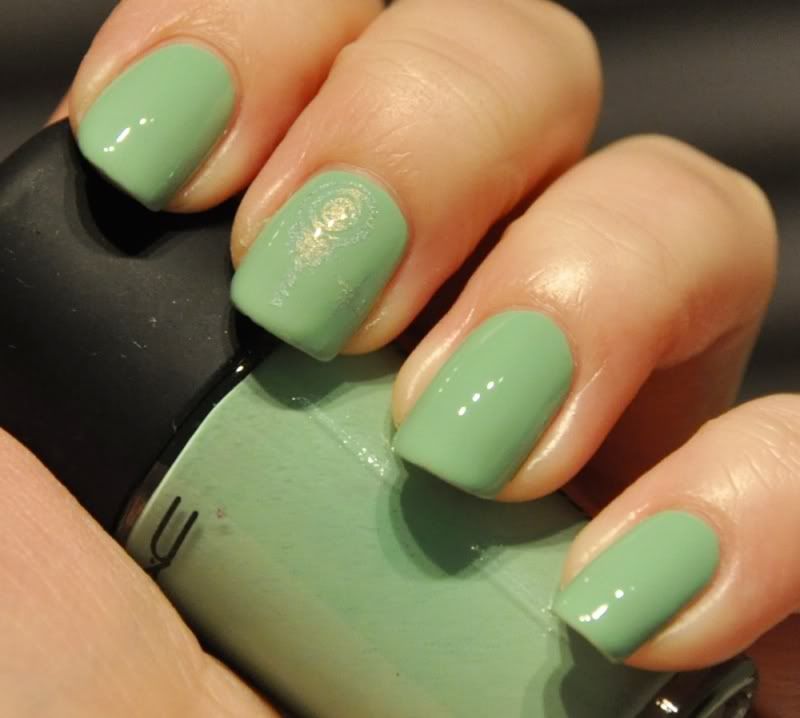
I'm wearing three coats as this polish is really thin (thankfully, it was easy to work with even so), one coat of Seche Vite and a holo stamped lollipop & sparkle on my middle finger. It's subtle, but it added a little bit of bling ;)

MAC Peppermint Patti - flash

MAC Peppermint Patti - no flash

MAC Peppermint Patti - flash

Close-up
The holo used it China Glaze OMG. 

Does it live up to my expectations? Yup, I'd say so! I had imagined it was a bit more turqouise and darker - but I love it even though it's a pale green ♥ I can't wear many of those as solid cremes!

♥ Vettelicious

lørdag den 4. december 2010

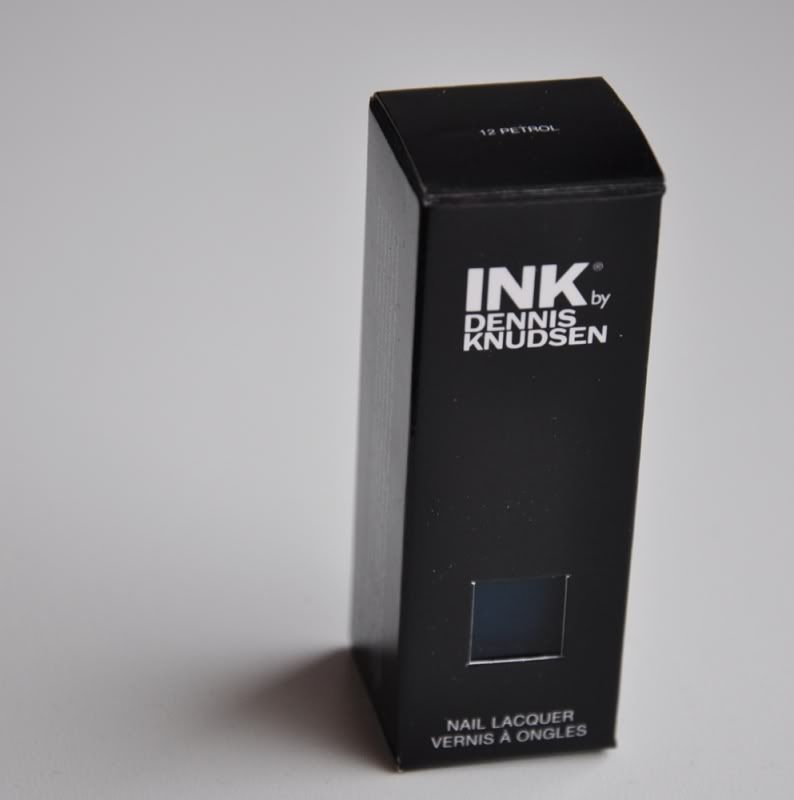
INK by Dennis Knudsen #12 Petrol

I was checking out sales during the last Open by Night in the town I live in a week ago. Open by Night is a night where shops stay open until 11 or so, usually having a lot of special offers and sales. This time it was a bit "meh", nothing too exciting was on sale, so I decided to splurge on a nail polish I've had a secret crush on in Matas. I have previously purchased a polish from H&M called Moody Model, as I thought they were identical - but I decided I couldn't live without "the real deal" - the one I initially fell for.


The polish is called #12 Petrol and is a limited edition polish of the INK collection by Dennis Knudsen. I'm no make-up brand whore, in fact I use very little make-up besides nail polish and eyeliner. I haven't tried any products from the DK range, but I liked the design (it's simple, black and white - it's like a danish, small brand version of Illamasqua and NARS).

INK by Dennis Knudsen - #12 Petrol

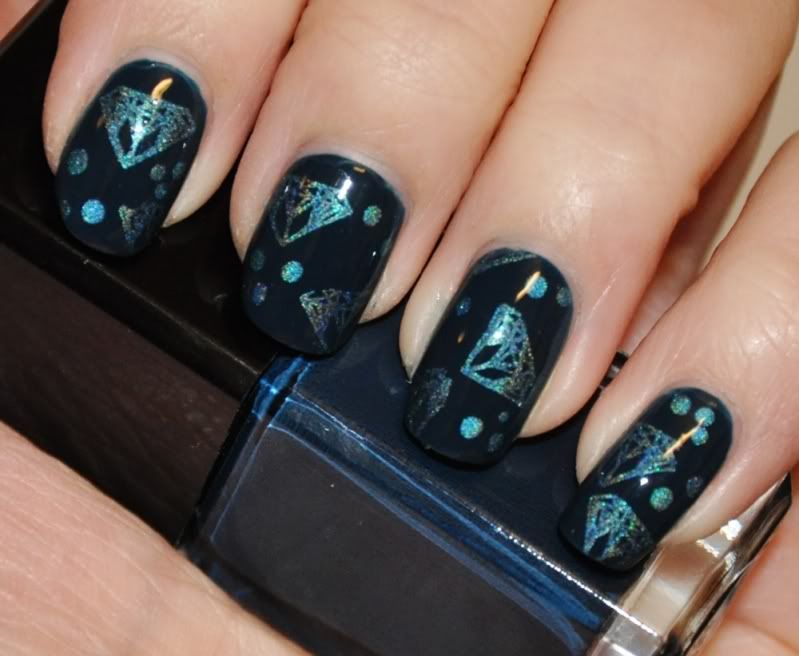
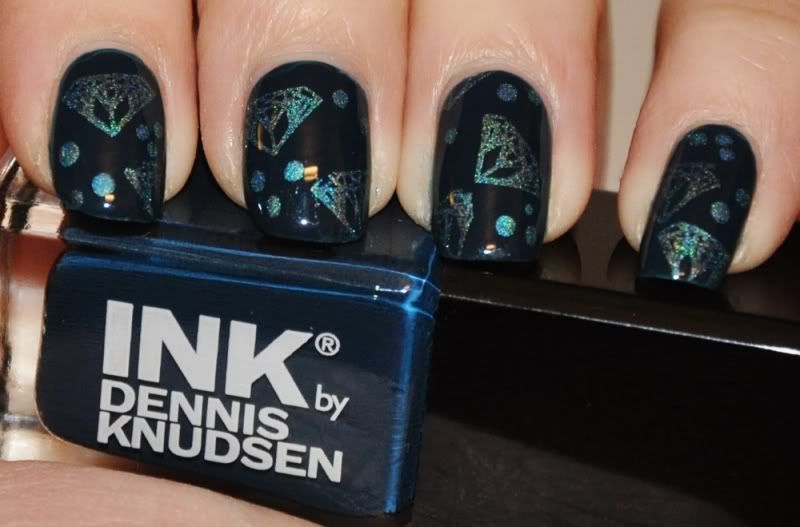
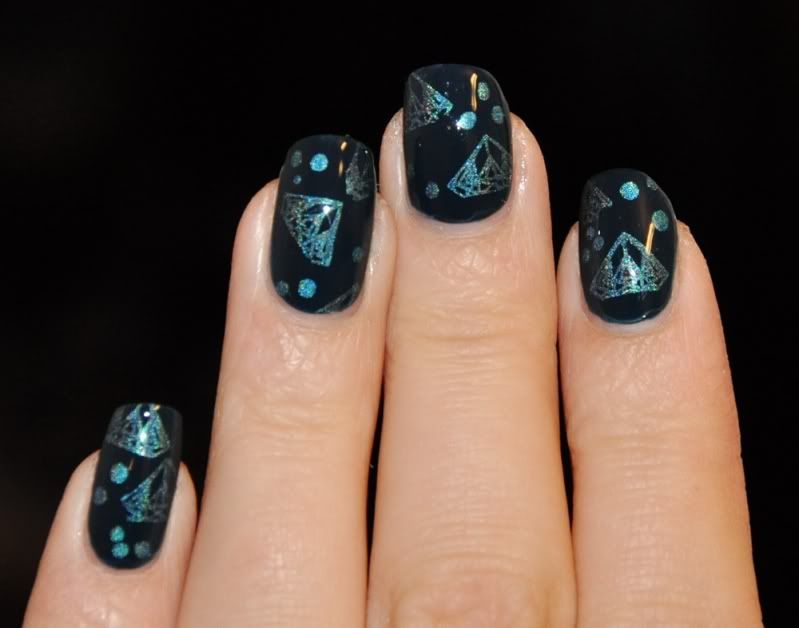
It's a very dark teal colour, or as you would refer to it, petrol. This colour in all it's shades is one of my favourite nail polish colours - I can't get enough of it. It's that perfect dark shade of blue with a hint of green ♥

Price wise, the bottle compares to Illamasqua - but is more expensive per ml. 
8 ml INK costs the equivalent of  14,75 €,
15 ml Illmasqua costs 15,30 €
It doesn't take too many brain cells to figure out which is cheaper. For what it's worth, INK is 3-Free and free of perfumes and parabens (which means a lot to me. I try to steer clear of polishes not 3-Free, though some containing toluene slips through my net).

Is INK worth the price? I had to try it to find out!

I used my regular basecoat, NailTek II and applied two coats of Petrol. It has a wonderful formula, was very easy to control and second layer smoothed it out perfectly. It had an average to good drying time, and there was no bubbles. It has a consistency somewhat similar to jellies - it's liquid, super shiny but at the same time very covering. Kind of like the base of Lippmanns Across the Universe - it looks like a jelly but applies like a creme. I LOVE jellies and jelly-cremes ♥ And a jelly-creme that only needs two coats is a winner in my book. It does stain, so be sure to use a good base and apply it as neatly as possible. My cuticles sure wish I knew this beforehand, LOL.
I compared Petrol to Moody Model, and they are not a match. If you'd like to see this compared to other teals, LMK and I'll do a comparison!
I decided to spice it up with a little stamping and dotting, for this I used my fav blue holo - DV8 from China Glaze's OMG collection.Topped it off with one coat of Seche Vite to protect the stamps.

DV8 ~ CG's OMG collection

I forgot to take pics before stamping, d'oh! I hope it gives you a good idea of Petrol anyway - if you like teal colours and don't mind the price, Petrol is amazing. I would spend the money again if I had to, and have been thinking about getting a spare bottle eventually.

INK - Petrol + CG - DV8 + Konad stamp and dotting tool

INK - Petrol + CG - DV8 + Konad stamp and dotting tool

INK - Petrol + CG - DV8 + Konad stamp and dotting tool


I can't say if all INK polishes are as great as I found this, but I'm curious to find out - if only my wallet allowed me! Have you tried some?

~ Vettelicious

tirsdag den 23. november 2010

Newest additions incl. prize from nail art contest

Hey!

I don't have much to show you, I've had the worst migraine for a few days and haven't had the energy to do my nails. My Zulu & Nfu Oh mani is still looking great with only minor tipwear, thankfully.

I thought I'd make a post with my recent buys - if you see anything you'd like swatched, throw a comment below and I will do so :) 

First, I received my prize from winning a nail art contest at NegleNymfer ~


Thank you so much girls! I love all of them, the small brights are great for patterns and I was very excited about Sinfull Senorita, which is a holographic polish from H&M! ♥ I'm saving it for a sunny day.

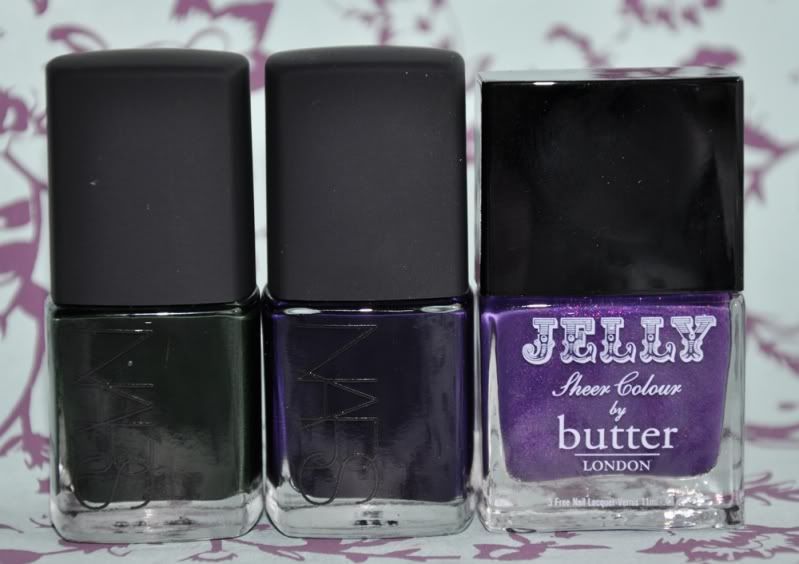
I purchased three of my major lemmings when I found them for sale in the same store - and cheaper than in the brands own stores! I am SO excited about all of them!!

NARS Zulu, Midnight Express, Butter LONDON Jelly Stroppy
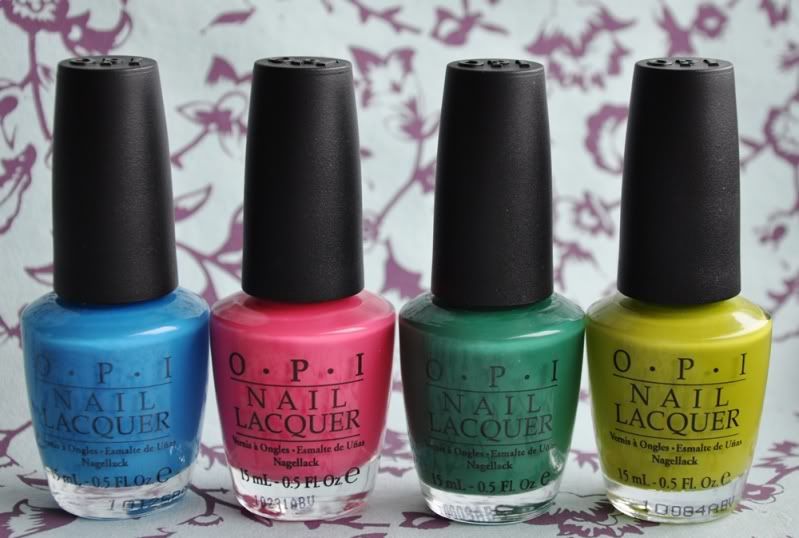
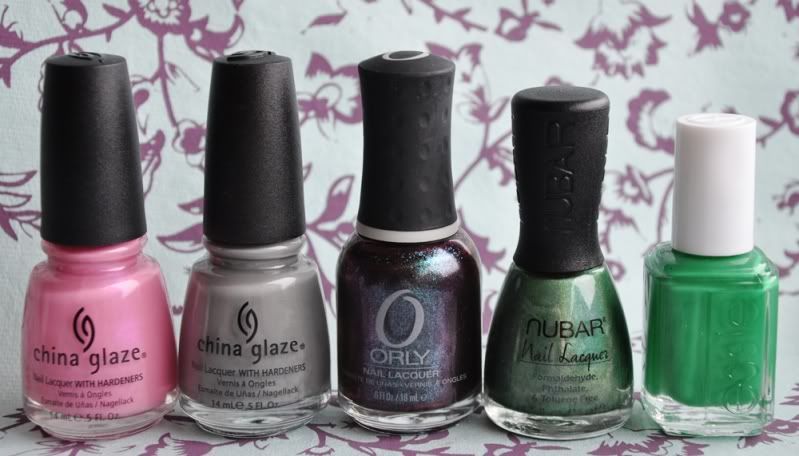
I also ordered some cremes from OPI, China Glaze and Essie - along with a Holo from Nubar and Galaxy Girl which I've shown you before ~

Ogre the Top Blue, Feelin' Hot Hot Hot, Jade is the New Black & Who the Shrek Are You?

Pink Underground, Recycle, Galaxy girl, Reclaim & Pretty Edgy

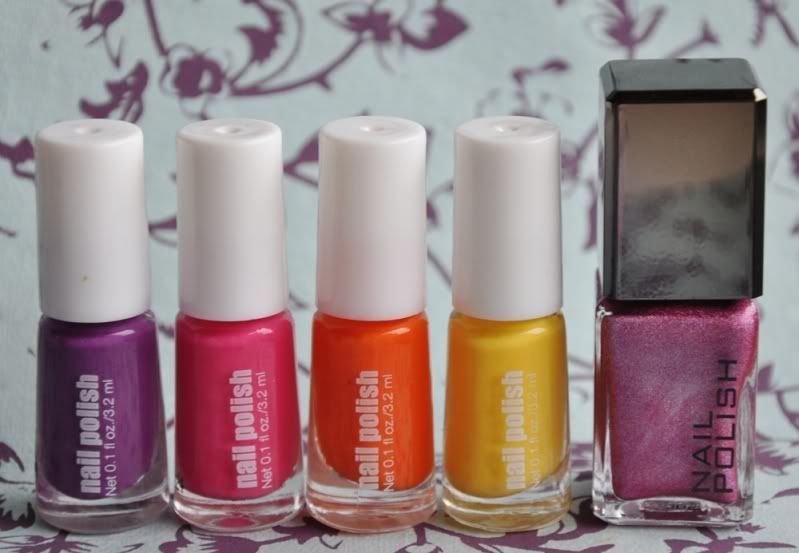
These I bought from a blog sale ~

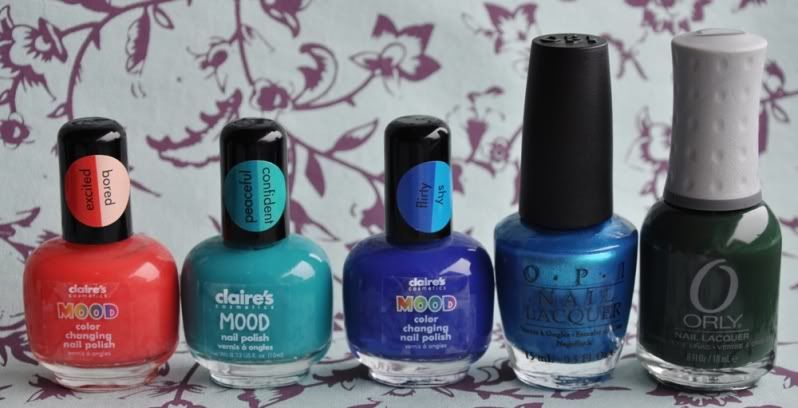
Bored/Excited, Peaceful/Confident, Flirty/Shy, Sea? I Told You! & Enchanted Forest

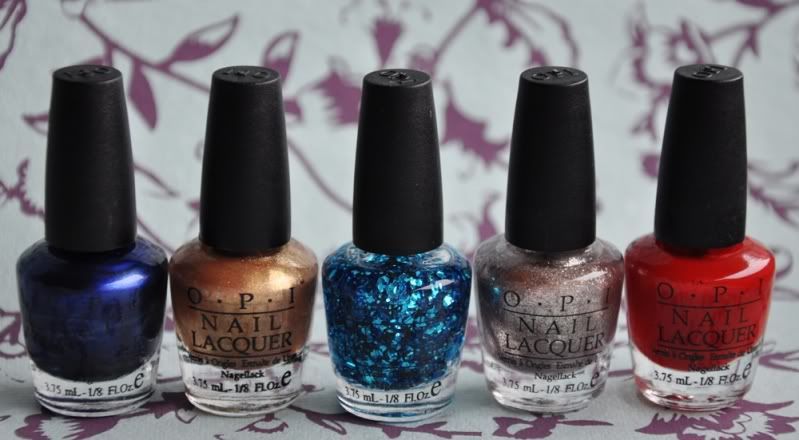
I bought these OPI Minis, and I would love to know what they're called. I'm looking forward to trying the middle one, it looks funky!

Can you help me name these OPI Minis?

I have a few other polishes I received a few days ago, but I'll wait with those - some of them will be featured soon! :) I'm sorry I'm currently flashing my hauls more than my nails.. I hope I get over this migraine soon!

~ Vettelicious